How to Privately Sign Secured iOS Apps
Signing iOS applications is required to install the applications on mobile devices. Many individuals sign within their development and integration platform. Still, some are required to sign the applications on designated computers in order to preserve the signing credentials within a trusted environment. This Knowledge Base article summarizes how to Sign Secured iOS Apps Privately.
Important Prerequisite Notes
OneShield Protection: Every time you build an app on Appdome, the final package is sealed, signed, and protected automatically by ONEShield, Appdome’s app hardening (app shielding) technology. This protects the app from tampering, reverse engineering, or other methods of compromise. To ensure Anti-tampering protection while signing locally, Appdome still needs to seal the app using the provisioning profile. Hence, the private signing process requires the provisioning profile.
Compatibility Requirements: The process below will only work for applications developed and signed in Xcode (or any other development framework) using the same certificates, provisioning profiles, and credentials that you will use to sign locally after Appdome. This is because mismatching entitlements may prevent the application from installing. On the Appdome platform, you can sign any app with any certificate since the platform resolves mismatching entitlements and performs enhanced in-depth checks.
Prerequisites
Ensure you have the following before starting:
- Appdome-GO access
- A Mac computer running OS X.
- The certificate (with private key) used to sign the app in Xcode must be stored in Keychain Access. For more details, see: How to Generate a P12 Certificate for Signing an iOS App
- A provisioning profile for each executable that requires signing. The provisioning profiles must be the same as those used to sign the app in Xcode before uploading the .ipa to Appdome. The App ID for the provisioning profile should be either a Wildcard or match the bundle id of the executable that needs signing. The provisioning profile should have the entitlements that are requested by the executable. If the fusion or the app needs AppGroups, the provisioning profile should contain them.
- Built .ipa downloaded from Appdome without signing by selecting the Private Signing option.
- The unprotected app
3 Easy Steps to Privately Sign Secured iOS Apps
Follow these step-by-step instructions to Privately Sign Secured iOS Apps.
- Download the secured IPA
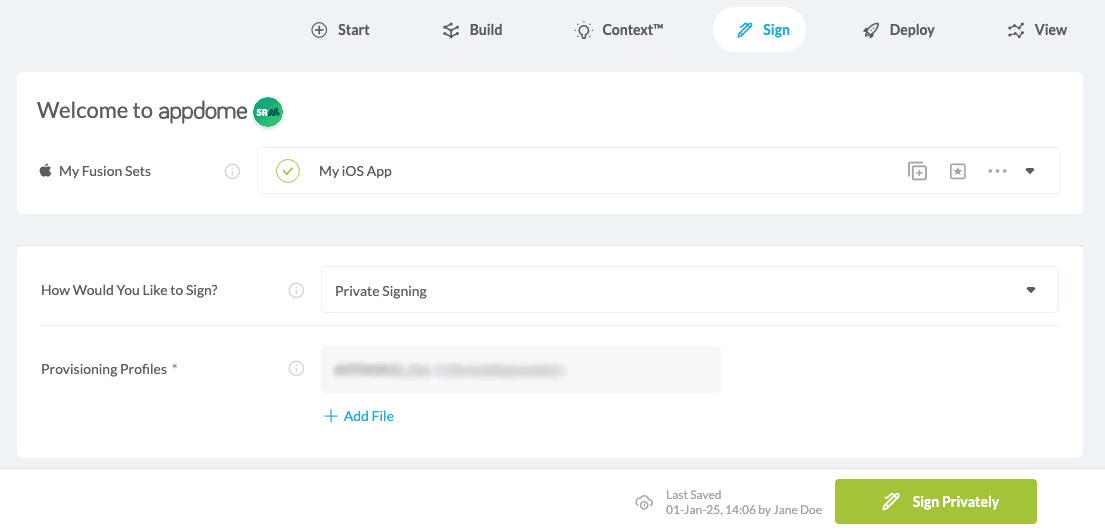
- Navigate to the Sign tab.
- Go to the section How Would You Like to Sign?
- Select Private Signing from the drop-down menu.
- Upload your Provisioning Profile
-
Optional: Save or Remove Signing Credentials
- Appdome allows saving signing credentials to streamline future signing processes. If the signing credentials are no longer needed or need to be updated, they can be removed directly from the Sign Tab by clicking the Remove Signing Credentials button.
- Click Sign Privately
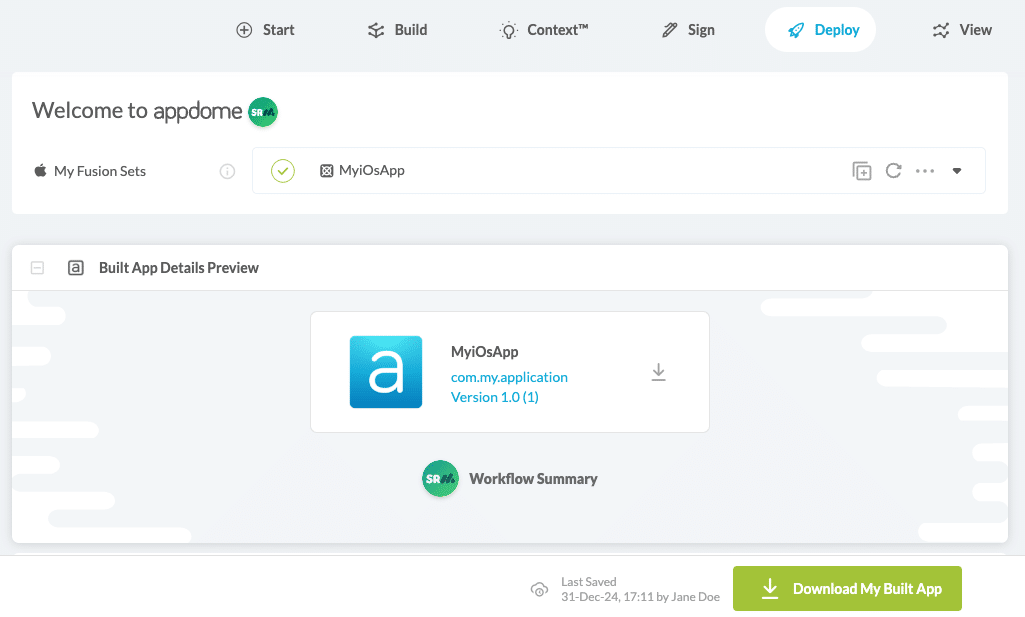
- Go to the Deploy tab and click Download My Built App.
- Unzip the secured IPA as well as the original IPA
unzip <ipa_path>.ipa -d PROTECTED_APP_OUTPUT_FOLDER_PATH
unzip <ipa_path>.ipa -d UNPROTECTED_APP_OUTPUT_FOLDER_PATH
- Sign the application executables in the correct order
If you have a Watchkit:
-
cp <path to watchkit extension mobile provision> PROTECTED_APP_OUTPUT_FOLDER_PATH/Payload/<app_name>.app/Watch/<watchkit_name>.app/PlugIns/<watchkit_name> Extension.appex/embedded.mobileprovision
-
codesign -d --entitlements :- UNPROTECTED_APP_OUTPUT_FOLDER_PATH/Payload/<app_name>.app/Watch/<watchkit_name>.app/PlugIns/<watchkit_extension_name>.appex/ > WATCHKIT_EXTENSION_ENTITLEMENT.plist
-
codesign -f -s "<Name in Keychain Access>" --entitlements WATCHKIT_EXTENSION_ENTITLEMENT.plist PROTECTED_APP_OUTPUT_FOLDER_PATH/Payload/<app_name>.app/Watch/<watchkit_name>.app/PlugIns/<watchkit name> Extension.appex/
-
cp <path to watchkit mobile provision> PROTECTED_APP_OUTPUT_FOLDER_PATH/Payload/<app_name>.app/Watch/<watchkit_name>.app/embedded.mobileprovision
-
codesign -d --entitlements :- UNPROTECTED_APP_OUTPUT_FOLDER_PATH/Payload/<app_name>.app/Watch/<watchkit_name>.app > WATCHKIT_ENTITLEMENT.plist
-
codesign -f -s "<Name in Keychain Access>" --entitlements WATCHKIT_ENTITLEMENT.plist PROTECTED_APP_OUTPUT_FOLDER_PATH/Payload/<app_name>.app/Watch/<watchkit_name>.app/
If you have an app extension, for each app extension:
-
cp <path to app extension mobile provision> PROTECTED_APP_OUTPUT_FOLDER_PATH/Payload/<app_name>.app/PlugIns/<plugin_name>.appex/embedded.mobileprovision
-
codesign -d --entitlements :- UNPROTECTED_APP_OUTPUT_FOLDER_PATH/Payload/<app_name>.app/PlugIns/<plugin_name>.appex/ > PLUGIN_ENTITLEMENT.plist
-
codesign -f -s "<Name in Keychain Access>" --entitlements PLUGIN_ENTITLEMENT.plist PROTECTED_APP_OUTPUT_FOLDER_PATH/Payload/<app_name>.app/PlugIns/<plugin_name>.appex/
REQUIRED – To sign the Appdome library:
-
cp <path to main app mobile provision> PROTECTED_APP_OUTPUT_FOLDER_PATH/Payload/<app_name>.app/Frameworks/libloader.framework/embedded.mobileprovision
-
echo -e '<?xml version="1.0" encoding="UTF-8"?>\n<!DOCTYPE plist PUBLIC "-//Apple Computer//DTD PLIST 1.0//EN" "http://www.apple.com/DTDs/PropertyList-1.0.dtd">\n<plist version="1.0">\n<dict>\n</dict>\n</plist>' > EMPTY_ENTITLEMENT.plist
-
codesign -f -s "<Name in Keychain Access>" --entitlements EMPTY_ENTITLEMENT.plist PROTECTED_APP_OUTPUT_FOLDER_PATH/Payload/<app_name>.app/Frameworks/libloader.framework/
If there are frameworks needing signing:
-
cp "<path/to/main.app.mobileprovision>" "PROTECTED_APP_OUTPUT_FOLDER_PATH/Payload/<app_name>.app/embedded.mobileprovision"
/Payload/<app_name>.app/embedded.mobileprovision
-
codesign -f -s "<Name in Keychain Access>" --entitlements EMPTY_ENTITLEMENT.plist "PROTECTED_APP_OUTPUT_FOLDER_PATH/Payload/<app_name>.app/Frameworks/<framework name>.framework"
REQUIRED – To sign the main application executable:
-
cp "<path/to/main.app.mobileprovision>" "PROTECTED_APP_OUTPUT_FOLDER_PATH/Payload/<app_name>.app/embedded.mobileprovision"
-
codesign -d --entitlements :- UNPROTECTED_APP_OUTPUT_FOLDER_PATH/Payload/<app_name>.app/ > MAIN_ENTITLEMENT.plist
-
codesign -f -s "<Name in Keychain Access>" --entitlements MAIN_ENTITLEMENT.plist "PROTECTED_APP_OUTPUT_FOLDER_PATH/Payload/<app_name>.app/"
11. Zip the IPA again.
cd "PROTECTED_APP_OUTPUT_FOLDER_PATH" && zip -qr "../<signed_ipa_name>.ipa" . && cd ..
The IPA that was created after this process should not be altered in any form. Now that the app is signed, changing any file inside the zip will tamper with the iOS signing and will prevent the app from being able to be installed.
Upload your signed app to Appdome’s validation service and verify it is signed correctly.
For every framework that isn’t signed correctly, follow the steps under the “To sign the Appdome library” section. This is required for frameworks that are added to your app in the fusion process. For example F5 Anti-Bot framework.
To read more about Appdome’s app validation, see the article How to Troubleshoot App Signing in Secured Android & iOS Apps.
After signing a framework, the main executable must be signed again.
The main executable must be signed last since it contains the signatures of all the frameworks and plugins.
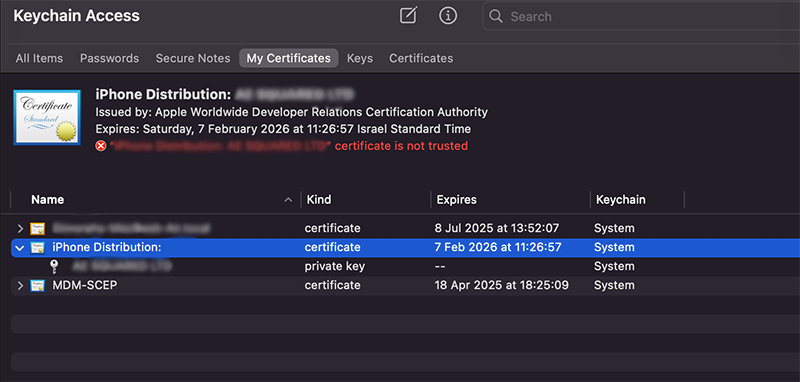
Troubleshooting for Private Signing
If you encounter the following scenario whereby your Key Chain Access files are showing the following message: “certificate name is not trusted,” apply the following steps to resolve the issue:
- Open the file
- Navigate to the fields titled “Common Name” and “Organizational Unit”
- Download the relevant “Apple Root Certificate” and “Apple Intermediate Certificates”.
For more details, see: Apple PKI documentation
How Do I Learn More?
If you have any questions, please send them our way at support.appdome.com or via the chat window on the Appdome platform.
Thank you!
Thanks for visiting Appdome! Our mission is to secure every app on the planet by making mobile app security easy. We hope we’re living up to the mission with your project.