How to Secure Android & iOS Apps in Bitrise CI/CD Pipelines
Appdome’s Build-2Secure step for Bitrise is an out-of-the-box integration that allows mobile app developers to automate the building, signing, and certification of security, anti-fraud, and other protections in Android and iOS apps using Bitrise CI/CD pipelines. No code or SDKs are required.
The purpose of Appdome’s Build-2Secure step for Bitrise is to streamline and accelerate cyber and anti-fraud delivery in CI/CD pipelines. To do this, the Build-2Secure step for Bitrise automates three essential steps in delivering more secure mobile applications to your users quickly:
(1) Building app-level protections into mobile apps.
(2) Code-signing the protected mobile app.
(3) Certifying the security of each protected mobile app.
By using the Appdome Build-2Secure step for Bitrise, you can quickly deliver Certified Secure™ mobile app security, anti-fraud, anti-malware, mobile anti-bot, and other cyber defense updates to mobile apps on the Appdome Cyber Defense Automation Platform. This step can be used as a stand-alone DevSecOps integration or in combination with other DevSecOps integrations in your CI/CD pipeline.
For more general information on Bitrise Workflow Steps, visit the Bitrise website and navigate to Managing Tools.
Prerequisites to use Appdome’s Build-2Secure Step for Bitrise
Before you begin using Appdome with Bitrise, you’ll need:
- An Appdome SRM account (create an Appdome account here)
- Appdome API token
- Fusion Set’s ID
- A Bitrise account
Step 1: Getting Started with Build-2Secure Step for Bitrise
The Appdome Build-2Secure step takes an unprotected application file (apk, aab, or ipa), rebuilds the file, and signs it using the On-Appdome platform, based on the selected fusion set and signature method. This step can be performed either as part of an existing workflow or as a new workflow, where you must provide the application file as part of the input.
When adding Appdome’s Build-2Secure step to an existing workflow, it must be added in the correct position: after the build step has generated a valid app (apk/aab/ipa) file and before the build artifact has been signed and deployed.
Step 2: Creating a New Workflow for the Build-2Secure Step in Bitrise
If you’re adding Build-2Secure to an existing workflow, skip this section and proceed to Step 3.
To create a new workflow:
To create a workflow with Appdome Build-2Secure:
- Log in to Bitrise and select your app from the Projects list.
Note: If your app is not on the list, follow the Bitrise process to add an app.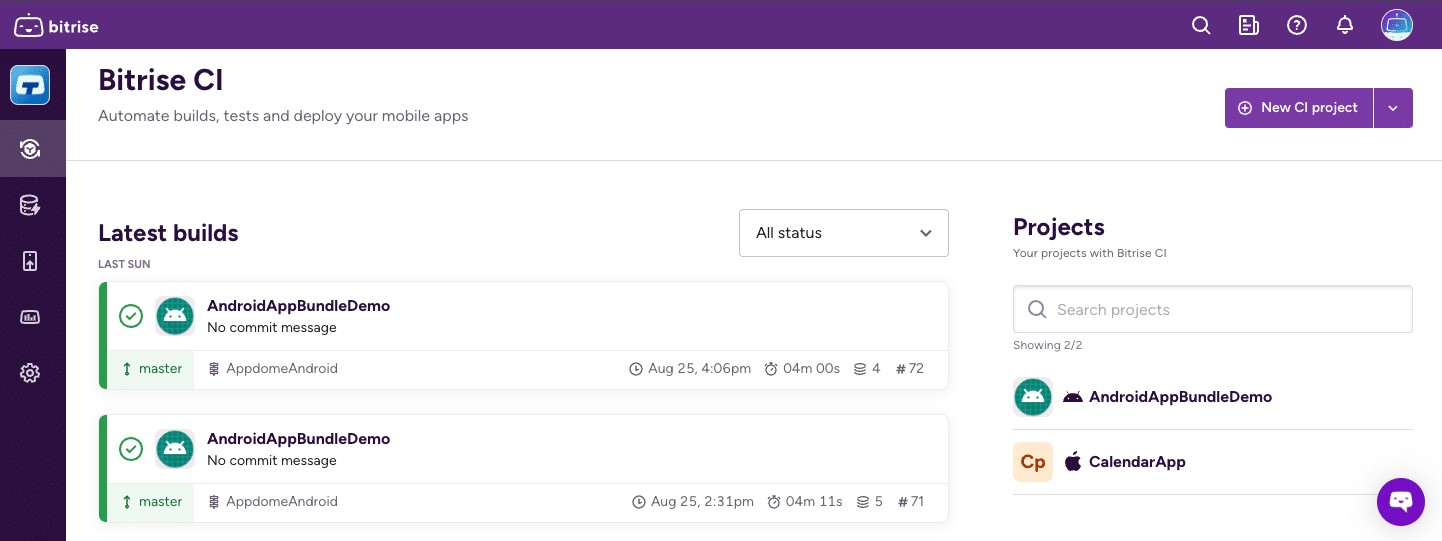
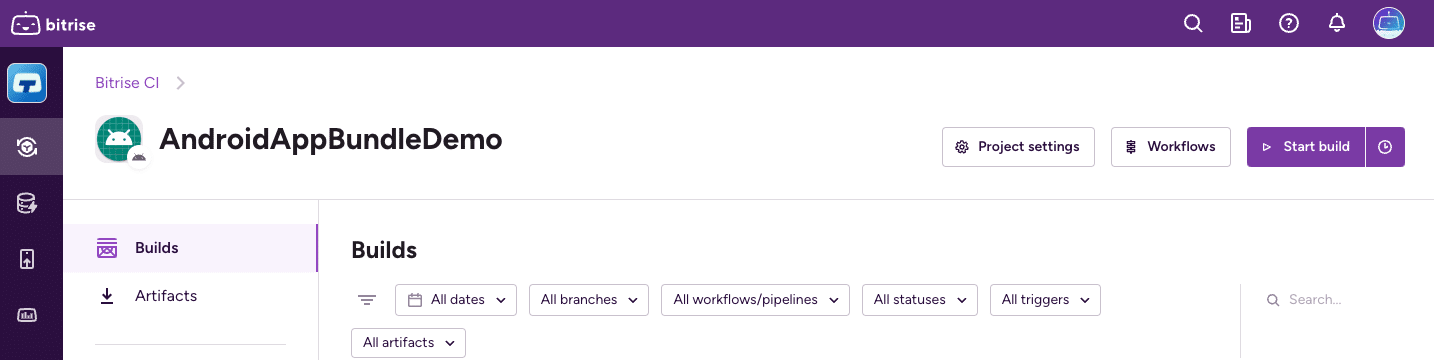
- Click the Workflows button at the top right to open the Workflow Editor.
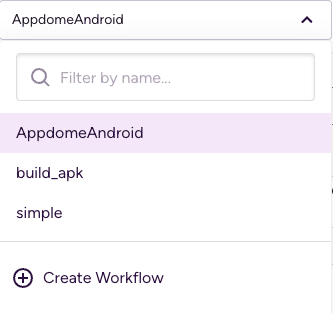
- Click + Create Workflow.
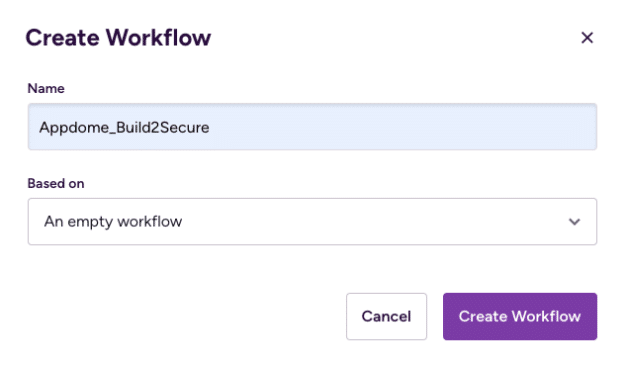
- Enter your workflow name and click Create Workflow.
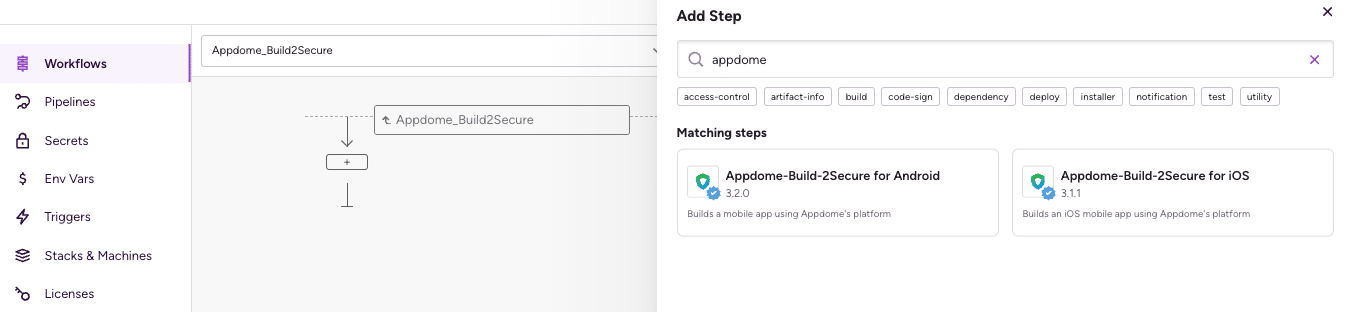
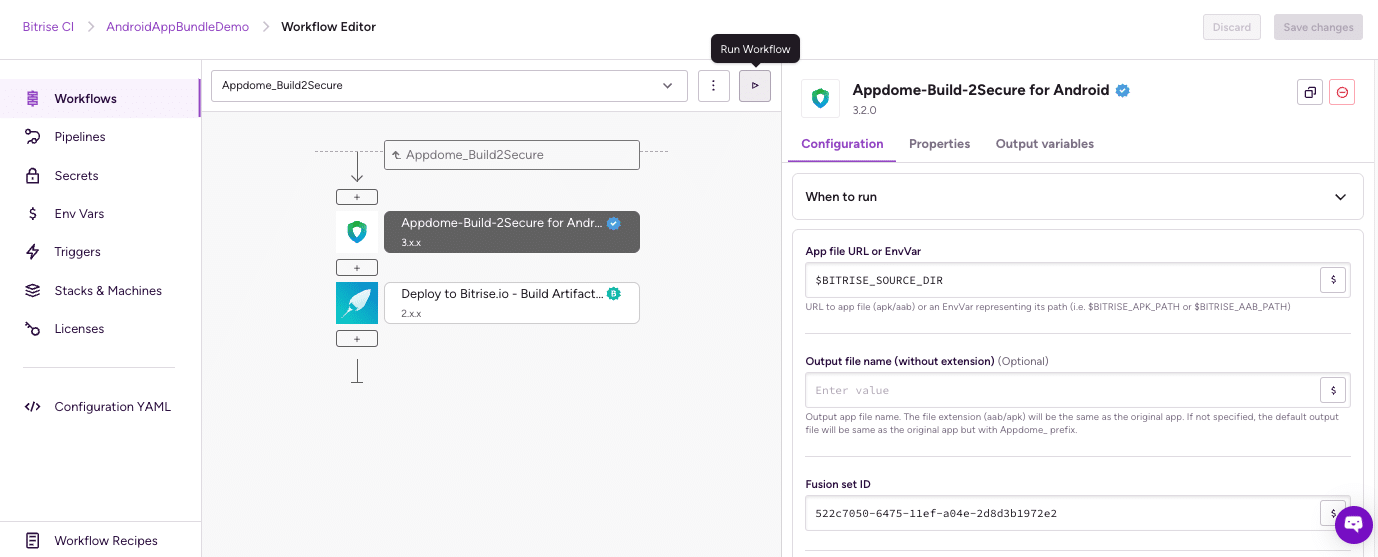
- Click the + icon directly under your workflow name in the workflow editor (as shown in the image below).
- This will display a list of available steps. Search for Appdome Build-2Secure and select it.
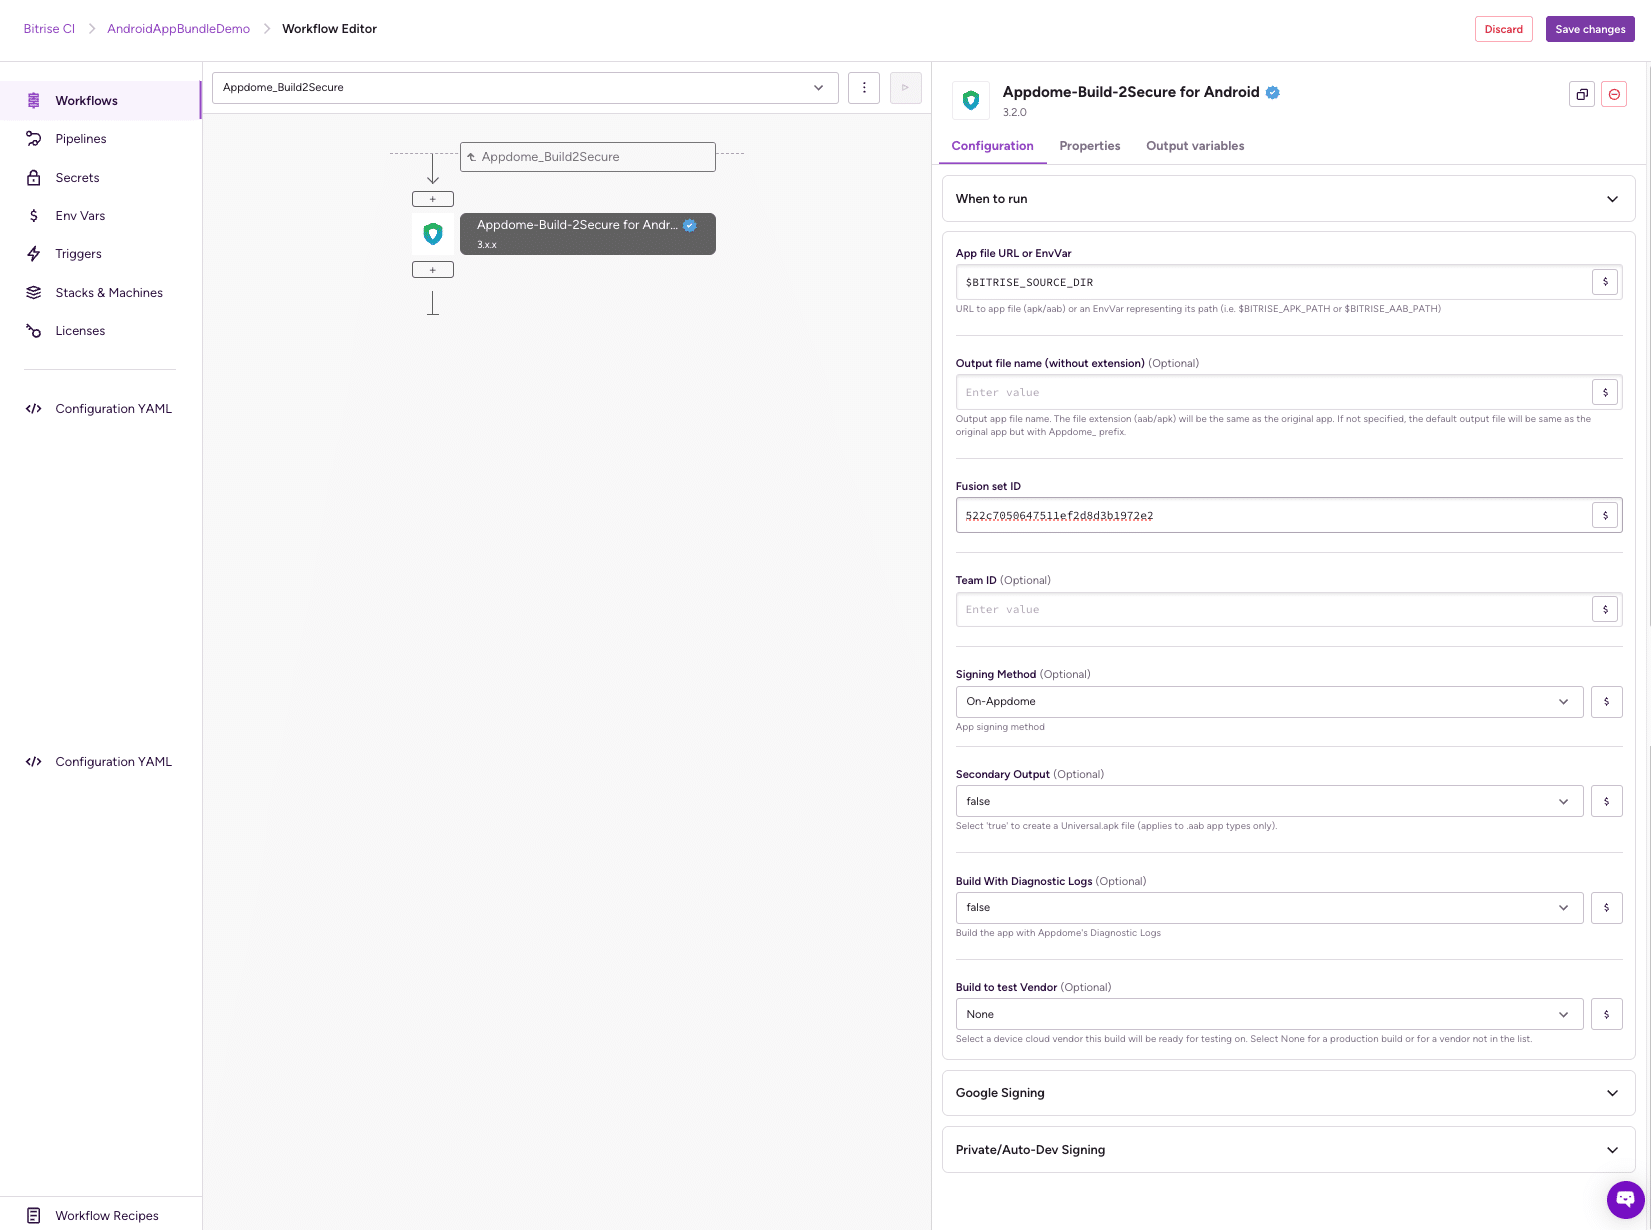
- Enter the following Build-2Secure Step Parameters:
- App file URL (mandatory)
The location of the app file (apk/aab/ipa) is to be built and signed by On-Appdome. This field can be a URL address of an external location or an environment variable indicating the file location.
Note: You can define your environment variables under the Env Vars tab. If you are using the Appdome Build-2Secure step as part of an existing workflow, this field should be populated with the output of the previous step; for example, $BITRISE_APK_PATH, $BITRISE_AAB_PATH, and $BITRISE_IPA_PATH. - Optional: Output file name
If you want the build output files to be automatically placed in the artifacts section, add the “Deploy to Bitrise.io – Build Artifacts, Test Reports, and Pipeline intermediate files” step by selecting it from the steps library. - Fusion Set ID (mandatory)
Appdome fusion set ID. Ensure that this ID is valid for the type of project you are using (Android/iOS). - Optional: Team ID
The team ID on the On-Appdome platform. - Select Signing Method (mandatory)
Use the Signing Method field to select the appropriate method for signing your app. Each signing method requires additional parameters, as detailed below. - Secondary Output (Android only)
Set to true if your app type is .aab and you require a secondary output in the form of a secured universal apk file. The output file will consistently be named “Appdome_Universal.apk” and will be represented by the $APPDOME_SECURED_SO_PATH environment variable. This option applies only to Android-type builds with .aab app types when using On-Appdome or Private Signing methods. - Build With Diagnostic Logs
Set to true if you want to build with diagnostics logs. - Build to test Vendor
Some protected builds cannot run or be tested on real device clouds due to the nature of the vendor’s cloud environment. By selecting a device cloud vendor, the build will be suitable for testing on the selected vendor. You will not be able to run this build on other vendors or an end-user device. For production or general-purpose builds, choose None.
Note: Use this option only for testing purposes on one of the selectable cloud vendors. For other purposes, select None.
- App file URL (mandatory)
- Name Your Workflow Logs File:
- When setting up your workflow on the Bitrise platform, you can assign a specific name to your Appdome workflow output log file. This name will help you identify your logs easily.

- When setting up your workflow on the Bitrise platform, you can assign a specific name to your Appdome workflow output log file. This name will help you identify your logs easily.
- Navigate to the Build Tab in your Bitrise dashboard to view the logs associated with your workflows.
- Under the ‘Build log’ tab, you will see detailed logs of your workflow. This includes any logs that are specifically generated by the Appdome integration.
- To access the Appdome workflow logs file you named earlier, click on the ‘Artifacts’ tab within the same build page. The log file will be available for download or review here.
- Continue adding the relevant steps to your workflow.
Step 3: Configuring Code Signing for Android and iOS Apps
There are 3 signing options available for both Android and iOS:
- On-Appdome
- Private-Signing
-
Auto-Dev-Signing
Android App Project – Signing Configuration
Keystore Configuration:
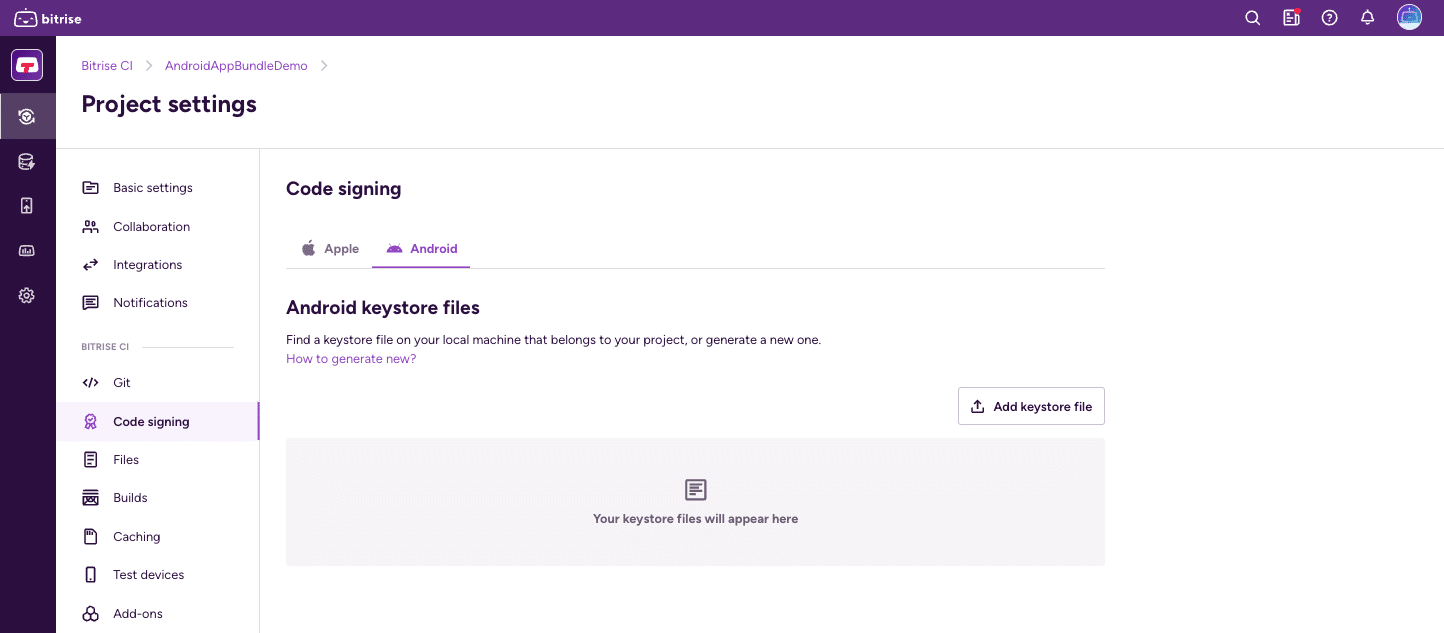
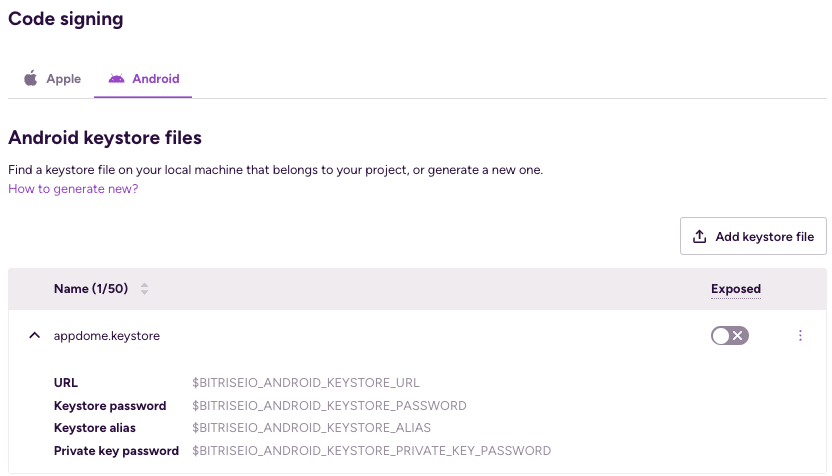
When signing an Android app project using the On-Appdome method , an Android Keystore file must be uploaded by following the steps below:
- Go to Project Settings and click on the Code Signing tab.
- Upload your Keystore file.
- Enter the keystore password, keystore alias, and private key password in the respective fields. Bitrise will automatically assign environment variables to these fields.
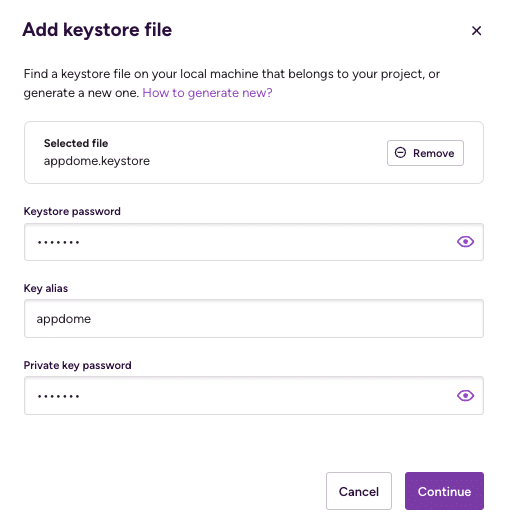
- Click Continue. After the file has been uploaded, its name will be displayed under the Android Keystore File section.
- Configure a specific keystore for each workflow (optional):
In the Workflow configuration, select the Keystore URL field. You can configure the specific env var name you’d like to use in the current workflow.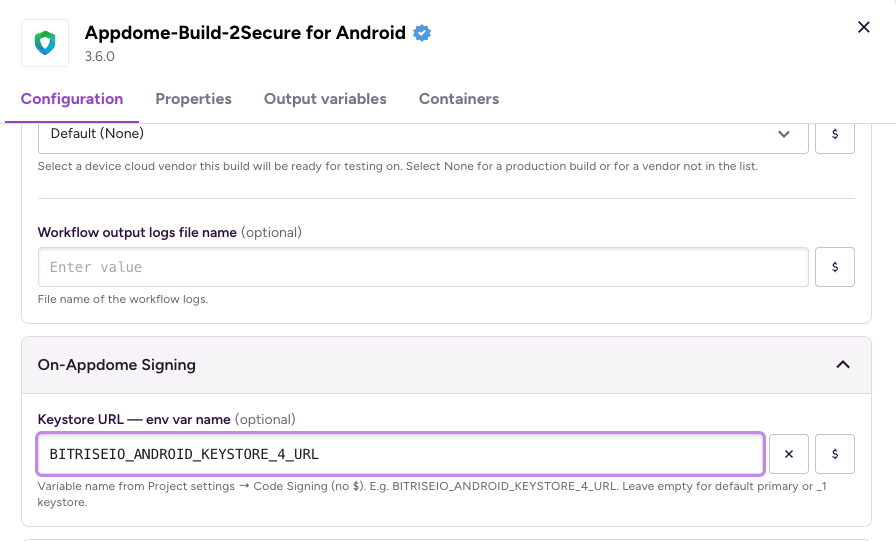
For an Android app project using the Private-Signing /Auto-Dev-Signing method:
-
Google Signing > Google Play Signing (Android only)
-
Set to true if Google Play signing is required or false if not.
-
If set to ‘true,’ a Google Sign Fingerprint must be provided. Click on the Google Signing category to expand it and configure the Google Signing parameters. Additionally, if ‘true,’ the $SIGN_FINGERPRINT is required in the Secrets tab.
-
Google Play Signing (Android only):
If your app will be uploaded to Google Play, you’ll need to configure Google Signing:
- Go to the Google Signing section.
- Set the Google Play Signing toggle to true.
- Define a Key named GOOGLE_PLAY_FINGERPRINT. This key is required if you are building an Android app that will be uploaded to Google Play. This variable should hold your Google Play fingerprint.
- Define a Key named SIGN_FINGERPRINT. If a Google Play signature is not required, then this variable should be holding your signing fingerprint.
Multiple Trusted Signing Certificates (optional) :
You can provide multiple trusted signing certificates using a JSON file. Each certificate can be designated for use in store uploads.
Example JSON file:
[
  {
    "SHA": "857444B491.....",
    "TrustedStoreSigning": false
  },
  {
    "SHA": "857444B492.....",
    "TrustedStoreSigning": true
  },
  {
    "SHA": "857444B493.....",
    "TrustedStoreSigning": true
  }
]
You can provide the Multiple Trusted Signing Certificates JSON file using one of the following methods:
- File path – Specify the direct path to the JSON file
- Environment variable – Use an environment variable that points to the file
- Bitrise File Storage:
- Go to Project Settings → Files
- Click Add file
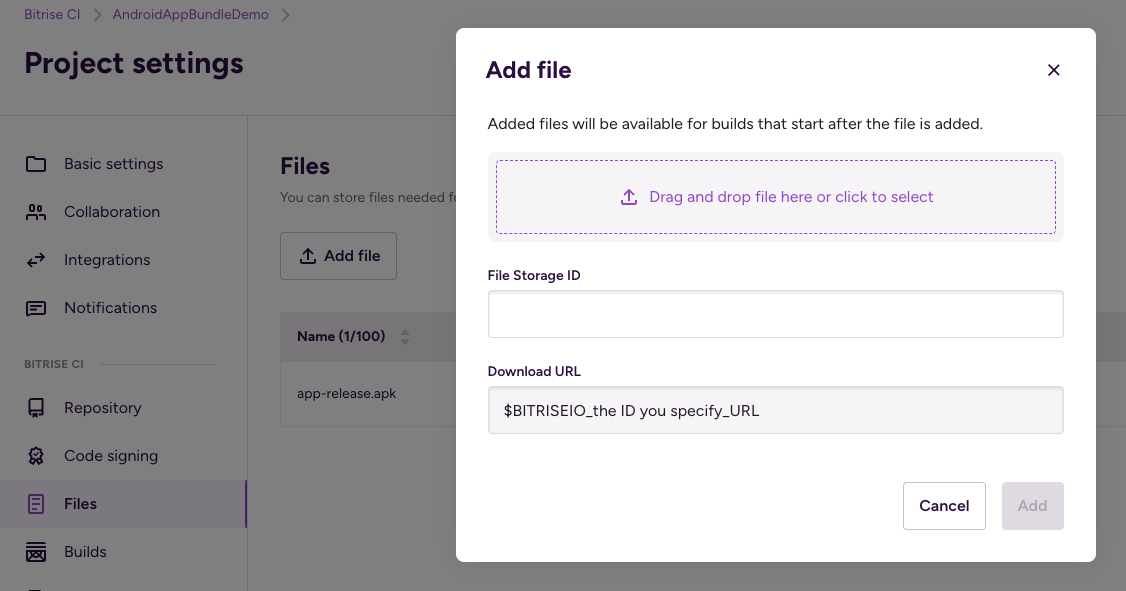
- Upload the JSON file
- Use the file’s Download URL as the value in the Multiple Trusted Signing Certificates field
-
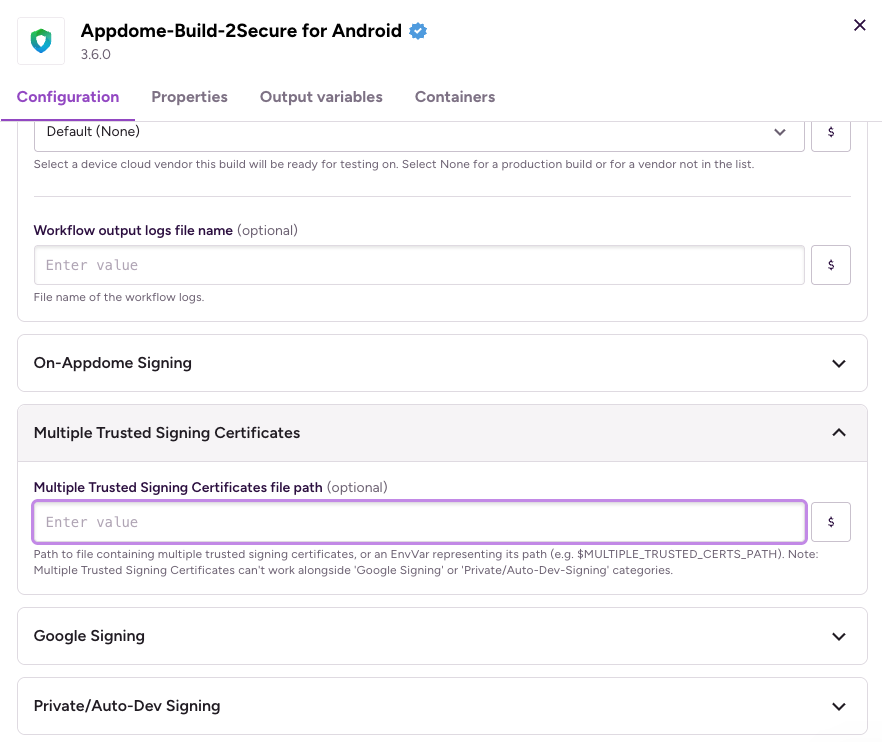
In your Workflow configuration select the “On Appdome” singing method.
-
Scroll down to “Multiple Trusted singing Certificates”
-
Add the file URL path:
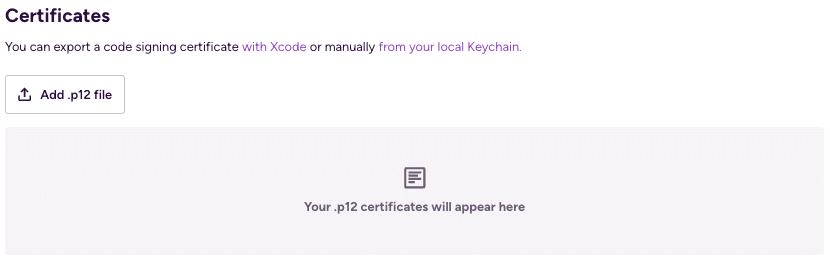
iOS App Project – Signing Configuration:
When signing an iOS app project using the On-Appdome method, an iOS .p12 file and provisioning profile must be uploaded:
For an iOS app project with an On-Appdome, Private-Signing/Auto-Dev-Signing signing method:
- Upload your .p12 file. Appdome signing supports only one certificate file, so if you’ve uploaded multiple certificate files, specify which one to use in the Code Signing Certificates (.p12) file name field.
- Enter the certificate password and click Continue.
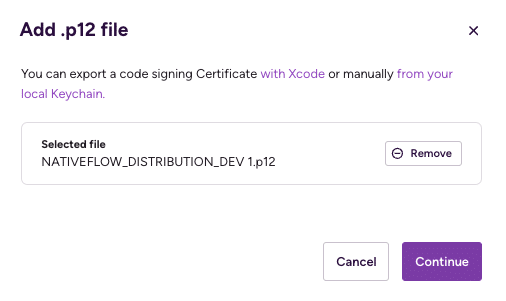
- Review the details and click Add Certificate.
- Upload the provisioning profile file to the Provisioning Profile section.
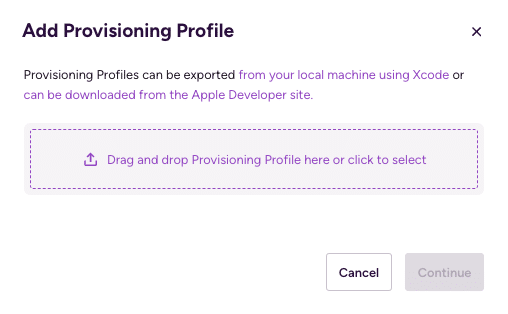
- Review the details and click Add Profile.
Note: Bitrise platform supports up to 60 provisioning files. If you have uploaded multiple certificate files, not all of them are required for a specific build. In that case, you will be able to specify which files to use for signing later during the step configuration process.
Define Environment Variables
Secrets are environmental variables that hold sensitive data. These are securely stored in the Bitrise platform.
- Click the Secrets tab.
- Click Add New.
- Define a Key named APPDOME_API_KEY with the value of your Appdome API token.
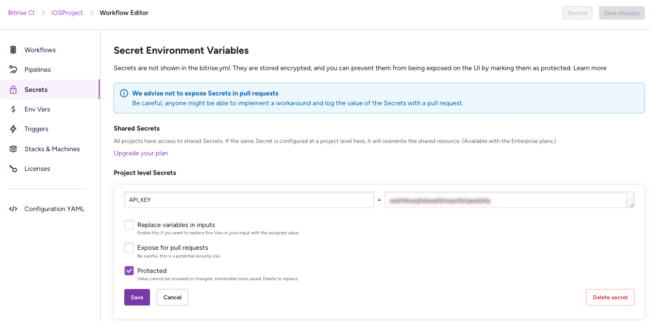
- Click Save.
Add Entitlements
- Navigate to Project Settings
- Click on the Files tab
- Click Add file
- Give each entitlement file a unique file storage ID and remember the variable name Bitrise assigned to it.
- In this example, the File Storage ID assigned to the entitlements file is ENTITLEMENTS_1.
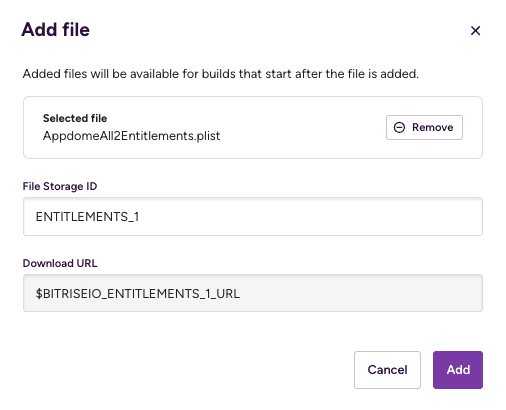
Note: In this example, Bitrise has assigned it the variable name $BITRISEIO_ENTITLEMENTS_1_URL. This name will be the environment variable referred to in the workflow. You can upload up to five entitlement files (each up to 5MB).
Step 5: Run the Workflow – Build & Sign Android & iOS Security with Build-2Secure
- After filling in these parameters, click Save Changes to save the workflow.
- If you are required to provide a branch name for your build, enter the branch name and click Run Workflow.
The Appdome Build-2secure will automatically listen for the build and sign commands sent from Bitrise and add the mobile app security, anti-fraud, and other protections to your Android or iOS mobile app as specified in the Fusion Set associated with this app.
Step 6: Retrieve DevSecOps Certification with Build-2Secure Step
When completed, the following environmental variables will hold the build output:
$APPDOME_SECURED_APK_PATH – Appdome secured build of a .apk app path.
$APPDOME_SECURED_AAB_PATH – Appdome secured build of a .aab app path.
$APPDOME_SECURED_SO_PATH – Appdome secured secondary output of a .aab app (Appdome_Universal.apk) path.
$APPDOME_SECURED_IPA_PATH – Appdome secured build of a .ipa app path.
$APPDOME_CERTIFICATE_PATH – Certified Secure Certificate .pdf file path.
$APPDOME_PRIVATE_SIGN_SCRIPT_PATH – Sign .sh script file path
$APPDOME_DEOB_MAPPING_FILES – Appdome de-obfuscation mapping files .zip file
If the Deploy to Bitrise.io—Build Artifacts, Test Reports, and Pipeline intermediate files step was used, the Appdome protected files (or .sh sign script) with the Appdome_ prefix, and the certificate PDF file will be in the Artifacts tab, both ready for download.
Congratulations! You can now use your secured mobile app.
Related Articles:
- How to Secure Android & iOS Apps in Jenkins CI/CD Pipelines
- How to Secure Android & iOS Apps in GitLab CI/CD Pipelines
- How to Use Secure Android & iOS Apps in GitHub CI/CD
How Do I Learn More?
If you have any questions, please send them our way at support.appdome.com or via the chat window on the Appdome platform.
Thank you!
Thanks for visiting Appdome! Our mission is to secure every app on the planet by making mobile app security easy. We hope we’re living up to the mission with your project.