How to Use F5 WAF with Appdome MobileBOT™ Defense
Introduction
Web Application Firewalls (WAFs), like the one offered by F5, play a crucial role in protecting web applications from a wide range of cyber threats. Using F5 WAF with Appdome’s MobileBOT™ Defense solution offers app developers a streamlined approach to protect backend APIs against malicious bots and botnets, credential stuffing attacks, DDoS, invalid traffic and other automated attacks. In this guide, you will learn how to set up Appdome MobileBOT™ Defense and mutual TLS (mTLS).
Before delving into the steps, let’s understand some of the terms used:
MTLS (Mutual Transport Layer Security): Mutual TLS (mTLS) is a method for mutual authentication in which both parties in a network connection validate the SSL certificates presented by each other against a trusted root Certificate Authority (CA) certificate.
Client Certificate: In cryptography, a client certificate is a type of digital certificate that is used by client systems to make authenticated requests to a remote server.
Safe Session: Represents sessions that are determined to be safe or not at risk of any threat.
At Risk Session: Represents sessions that are potentially under threat or have detected anomalies.
Header Payload: The data transferred in the header of HTTP requests or responses. Protecting this data ensures that it cannot be tampered with during transit.
RSA private and public keys: The RSA private key is used to generate digital signatures, and the RSA public key is used to verify digital signatures.
Prerequisites for Using F5 BIG-IP Mobile App Configuration
In order to use the F5 Anti Bot verification app in conjunction with Appdome, you’ll need:
- A configured and accessible BIG-IP server
- A server protected by F5’s BIG-IP
- An Android or iOS app that is secured by MobileBOT™ Defense
- An Appdome MobileBOT™ Defense License
How to Configure the WAF to Parse Safe Session and At Risk Session
When Appdome’s code is integrated into the F5 WAF, it enhances the firewall’s capability to determine the validity of a session. To categorize sessions as “Safe Session” or “At Risk Session”, Appdome’s code analyzes specific headers within incoming requests: Timestamp, Nonce, and SignedMessage. The Timestamp header allows Appdome’s code to detect potential delay attacks by comparing the request’s timestamp with the server’s time. The Nonce, a unique random value, ensures the uniqueness of each request, protecting against replay attacks. The SignedMessage, typically an RSA-encrypted SHA256 hash of the timestamp, nonce, and a shared secret, ensures the integrity of the request.
Getting Started with F5 Setup and Configuration
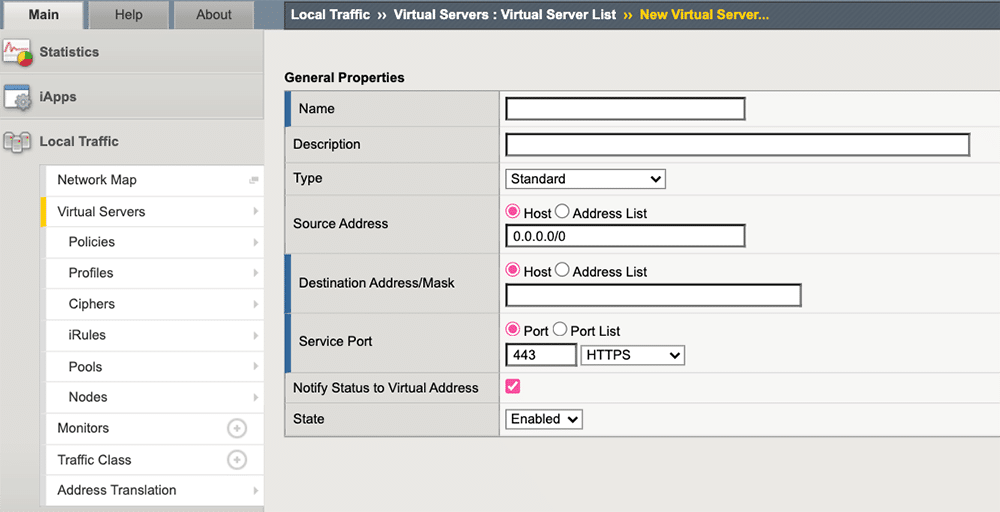
Create a Virtual Server
1. Go to Local Traffic -> Virtual Servers
2. Set source address to 0.0.0.0/0 to include all addresses
3. Set the Destination Address/Mask to the internal IP of the machine
4. Select a service port; usually it should be 443
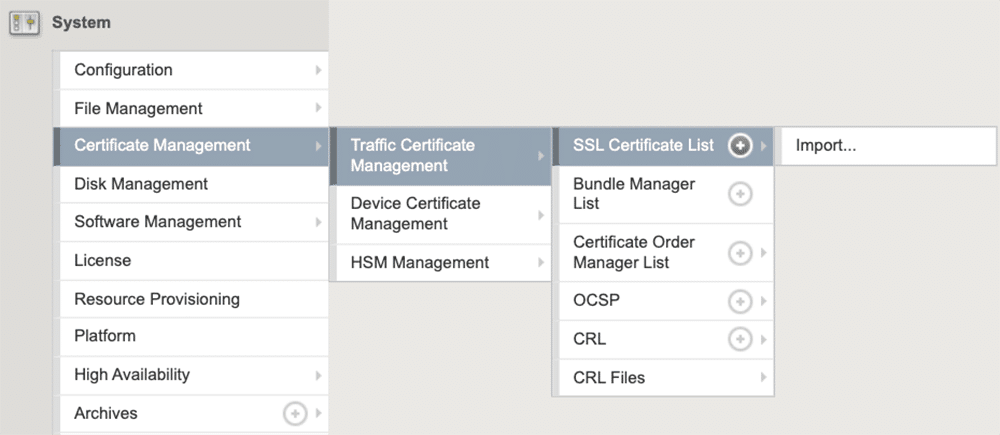
Upload an RSA Certificate & Key
1. Go to System -> Certificate Management -> Traffic Certificate Management -> SSL Certificate List
2. If you plan on using mTLS, to upload the CA certificate, this will be required in the last step.
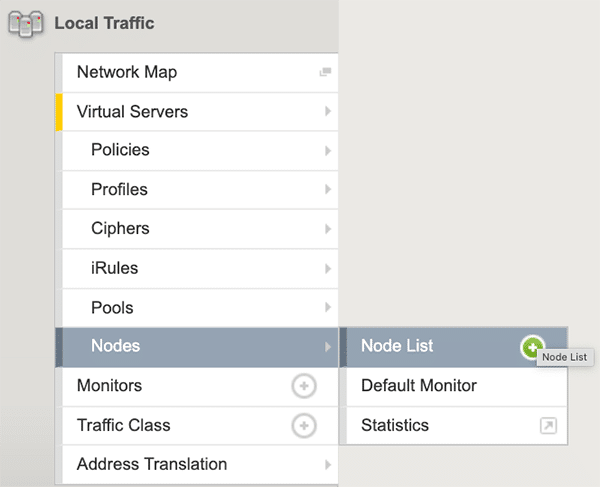
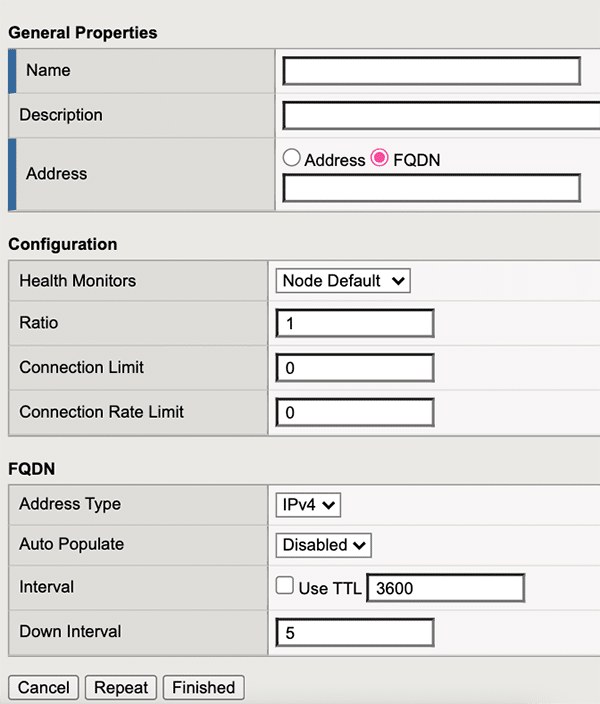
Create a Node for Your Service
1. Go to Local Traffic -> Nodes
2. Create a new node
3. Configure name
4. Configure FQDN – should be the destination domain
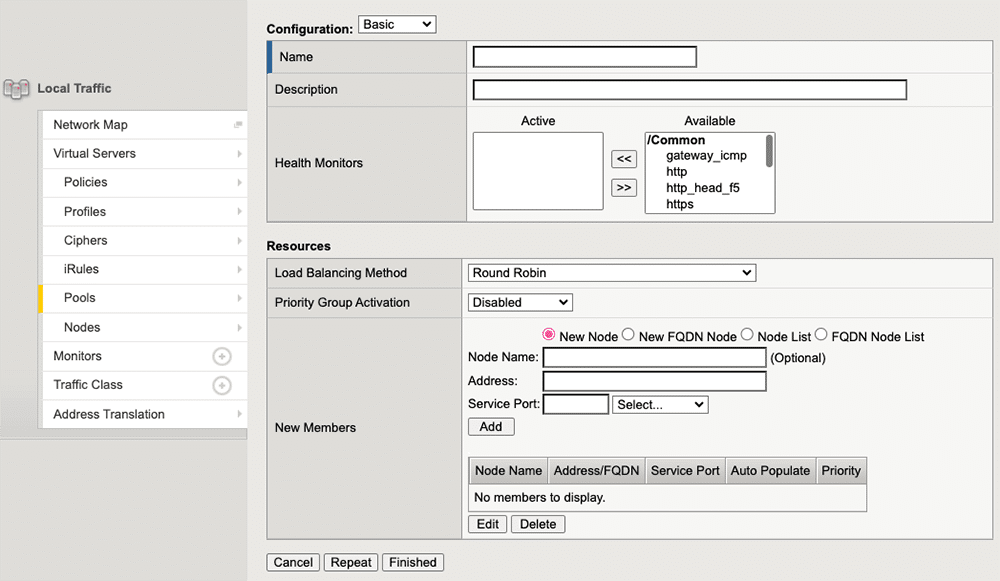
Create a Pool
1. Go to Local Traffic -> Pools List
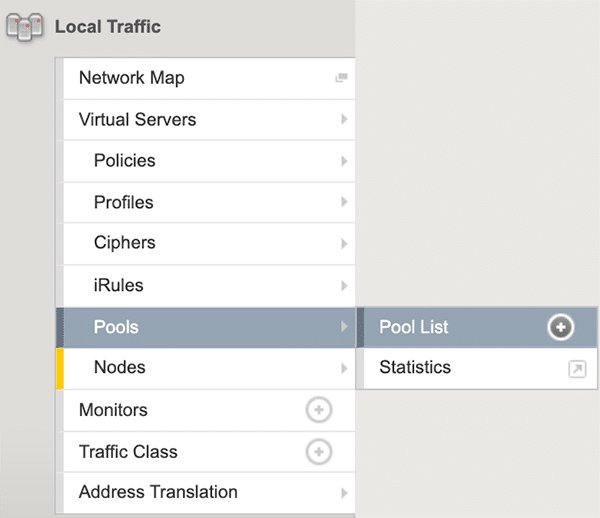
2. Create a new pool
3. Configure a name
4. Go to New Members -> Add -> Select FQDN Node List and select the node you created
5. Configure its port
How to Configure the WAF for Client Certificates for MTLS
Create a Client SSL Profile
1. Go to Local Traffic -> Profiles -> SSL -> Client
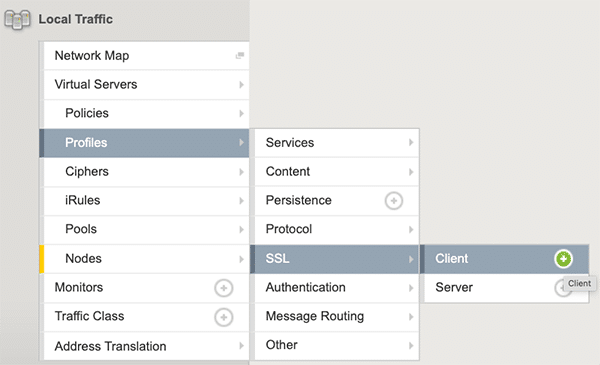
2. Enable the Client Certificate checkbox

3. Configure name
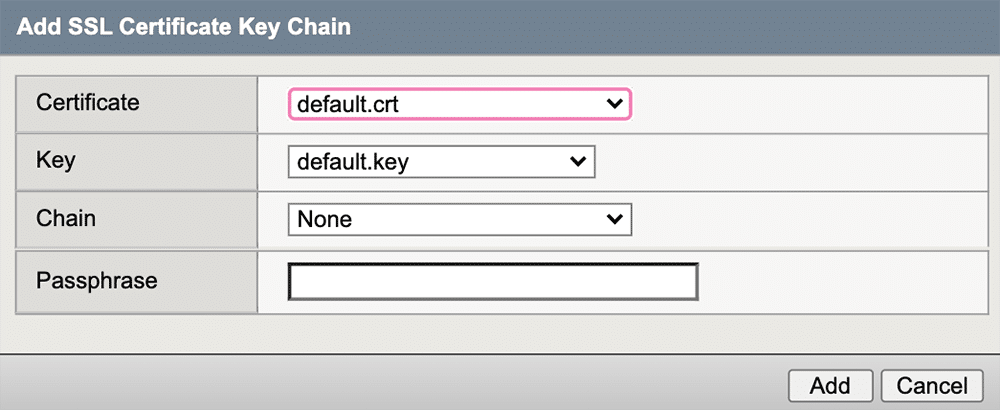
4. Select Certificate Key Chain
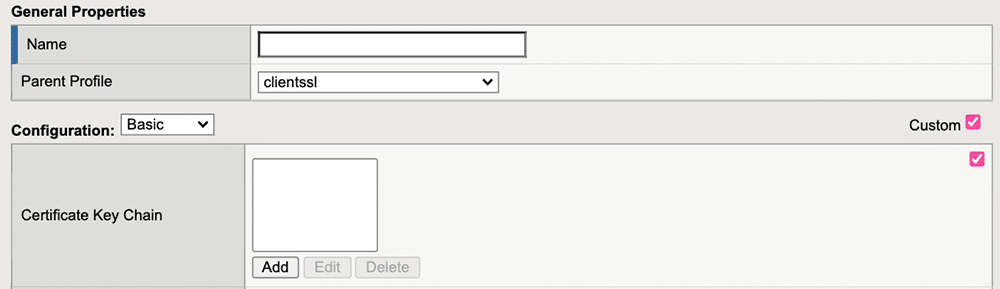
4. Select your certificate and key (passphrase if was provided when creating the certificate)
Associate the Client SSL Profile to the Virtual Server
1. Go to Local Traffic -> Virtual Servers
2. Select your server
3. Under SSL Profile (Client), select the profile you created
![Ssl Profile [client]](https://www.appdome.com/wp-content/uploads/2023/10/SSL-profile-client-1.png)
Upload the Certificate for Payload Validation
1. Go to System -> File Management -> iFile List
2. Upload the private key that will be used for payload decryption and validation, the pair to the key that was uploaded in the fuse process
3. Go to Local Traffic -> iRules -> iFile List
4. Create a new iFile, and select the iFile you uploaded

How to Configure the WAF to Validate the Header Payload
Create an iRule and Point it to the Created Pool
1. Go to Local Traffic -> iRules
2. Configure name
3. Paste the provided iRule
when RULE_INIT {
    set static::priv_key [ifile get <PRIVATE_KEY_IFILE_NAME>]
}

when HTTP_REQUEST {
    set host [getfield [HTTP::host] ":" 1]
    foreach aHeaders [HTTP::header names] {
        log local0. "HTTP header name $aHeaders : [HTTP::header values $aHeaders]"
    }
    set shared_secret "<SHARED_SECRET>"
    set compromised_secret "<COMPROMISED_SECRET>"

    set timestamp [expr { [HTTP::header "Timestamp"] != "" ? [HTTP::header "Timestamp"] : [HTTP::cookie "Timestamp"]}]
    set signedmessage [expr { [HTTP::header "Signedmessage"] != "" ? [HTTP::header "Signedmessage"] : [HTTP::cookie "Signedmessage"]}]
    set nonce [expr { [HTTP::header "Nonce"] != "" ? [HTTP::header "Nonce"] : [HTTP::cookie "Nonce"]}]

    set time [clock format [clock seconds] -format "%d/%b/%Y:%H:%M:%S %z"]
    log local0. "Local time: $time"

    set encodedReasonCode [HTTP::header "ReasonCodes"]

    if { $timestamp == "" || $nonce == "" || $signedmessage == "" } {
        log local0. "Missing values!"
        HTTP::respond 412 content "Missing values"
        return
    }

    set now [clock seconds]
    set heartbeat_validity <HEARTBEAT_VALIDITY>
    set time_elapsed [expr { $now - $timestamp }]

    if { $time_elapsed > $heartbeat_validity } {
        log local0. "Heartbeat expired"
        HTTP::respond 408 content "Heartbeat expired"
        return
    }

    if { [table lookup -notouch $nonce] != "" } {
        log local0. "Nonce used - rejecting [IP::client_addr]"
        HTTP::respond 409 content "Nonce used"
        return
    }

    set valid [sha256 "$timestamp\_$nonce\_$shared_secret"]
    set compromised [sha256 "$timestamp\_$nonce\_$compromised_secret"]

    set indata [binary format H* $signedmessage]
    set outdata  [CRYPTO::decrypt -alg rsa-priv -key $static::priv_key $indata]

    set headersList {"Timestamp" "Signedmessage" "Nonce"}

    for {set i 0} {$i < [llength $headersList]} {incr i} {
        HTTP::header remove [lindex $headersList $i]
        HTTP::cookie remove [lindex $headersList $i]
    }

    if { $outdata == $valid } {
        log local0. "Valid request"
        table set $nonce [IP::client_addr] 3600
        <host> {
            HTTP::host "<host header>"
            pool /Common/<pool name>
        }
    } elseif { $outdata == $compromised  } {
        log local0. "Compromised request from [IP::client_addr]"
        log local0. "Encoded Reason Code: $encodedReasonCode"
        if {[catch {b64decode $encodedReasonCode} decodedReasonCode] == 0 and $decodedReasonCode ne ""}{
            set trimEnd [string index $decodedReasonCode end]
            set decodedReasonCode [string trim $decodedReasonCode $trimEnd]
            log local0. "Decoded Reason Code: $decodedReasonCode"
        } else {
            log local0. "Reason Codes decoding failed"
        }
        HTTP::respond 406 content "Compromised request"
    } else {
        HTTP::respond 401 content "Could not verify request"
    }
}
4. Adjust the name of the PRIVATE_KEY_IFILE_NAME to the name of the iFile you created
5. Adjust variables
-
-
- SHARED_SECRET
- COMPROMISED_SECRET
- HEARTBEAT_VALIDITY
-
6. Adjust the valid block at the bottom that will proxy valid requests to your server.
- Which host to capture
- Change host header
- Change pool
7. Adjust the switch statement and add your hosts. Modify the host header if required, as shown in the next section
Associate the iRule to the Virtual Server
1. Go to Local Traffic -> Virtual Servers
2. Select your server
3. Under iRules select the iRule you created

Configure Mutual TLS
1. Go to Local Traffic -> Profiles -> SSL -> Client
2. Select your profile
3. Under Client Certificate select Require
4. Under Trusted Certificate Authorities select the CA certificate of your choice
5. Go to Local Traffic -> Virtual Servers
6. Select your server
7. Under SSL Profile (Client) select the profile you created
Conclusion
By using F5 WAF and Appdome’s MobileBOT™ Defense, you can protect your backend APIs against malicious bots and enhance the security of mobile apps. By mastering and implementing the aforementioned configurations, businesses can safeguard and optimize their mobile app traffic.
Related Articles:
- MobileBOT™ Defense
- How to Block Mobile Bots with Client Certificates, Authenticate Legitimate Mobile Apps
- How to Secure Android & iOS Apps in Azure DevOps Pipelines
Thank you!
Thanks for visiting Appdome! Our mission is to secure every app on the planet by making mobile app defense easy. We hope we’re living up to the mission with your project. If you don’t already have an account, you can sign up for free.