How to Secure Android & iOS Apps in Azure DevOps Pipelines
This Knowledge Base article provides instructions for using the Appdome Build-2Secure extension for Azure CI/CD pipelines. Appdome’s Build-2Secure extension for Azure is an out-of-the-box Azure CI/CD integration, making it easy for mobile developers to secure Android & iOS apps in Azure CI/CD pipelines. Automate the build, signing, and certification of security, anti-fraud, and other protections in Android & iOS apps in Azure CI/CD pipelines. No code and no SDKs are required.
The purpose of Appdome’s Build-2Secure extension for Azure is to streamline and accelerate cyber and anti-fraud delivery in CI/CD pipelines. To do this, the Build-2Secure extension for Azure automates three important steps in delivering more secure mobile applications to your users fast: (1) building the selected app-level protections into mobile apps, (2) code signing the Appdome-protected mobile app, and (3) certifying the defenses inside each Appdome-protected mobile app. The Appdome Build-2Secure extension for Azure is used to deliver Certifed Secure™ mobile app security, anti-fraud, anti-malware, mobile anti-bot, and other cyber defense updates in mobile apps on Appdome’s Cyber Defense Automation Platform. Use this extension for Azure as a stand-alone DevSecOps integration or in combination with other DevSecOps integrations in your CI/CD pipeline.
For more general information on this extension, see ‘What is Azure pipelines?‘ on the Azure website.
Here are the step-by-step instructions on using the Appdome Build-2Secure extension for Azure. Enjoy!
Prerequisites:
- An Appdome SRM account
- Appdome API token
- Fusion-Set ID
- An Azure Devops account
- Review Network Requirements for Using Appdome Build-2Secure API
Step 1: Getting Started with Build-2Secure Extension for Azure
Azure Pipelines automatically builds and tests code projects. It supports all major languages and project types and combines continuous integration, continuous delivery, and continuous testing to build, test, and deliver your code to any destination.
The Appdome Build-2Secure extension takes the unprotected application file (apk, aab or ipa), rebuilds the file, and signs it by using the On-Appdome platform, based on the selected fusion set and signature method. This step can be performed either as part of an existing pipeline or as a new pipeline where you must provide the application file as part of the input for this step.
If you already have an existing pipeline, you can skip to Step 3.
Step 2: Installing Build-2Secure Extension for Azure
Follow the steps below to install the Appdome Extension from the Azure DevOps Marketplace.
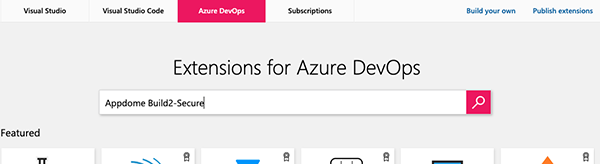
- Go to Azure DevOps marketplace > Azure Devops tab.
- Search for Appdome Build-2Secure in the search box.
`
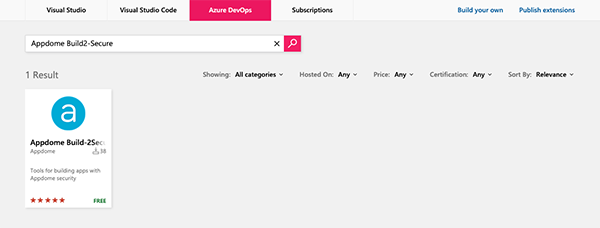
The Results window displays an option showing the Appdome extension.
-
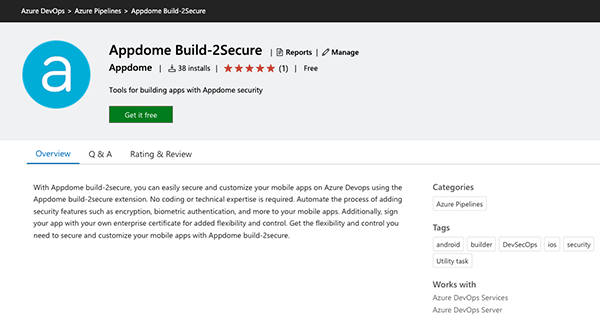
Open the obtained result and click on Get it free, to get the Appdome Extension in your organization for free.
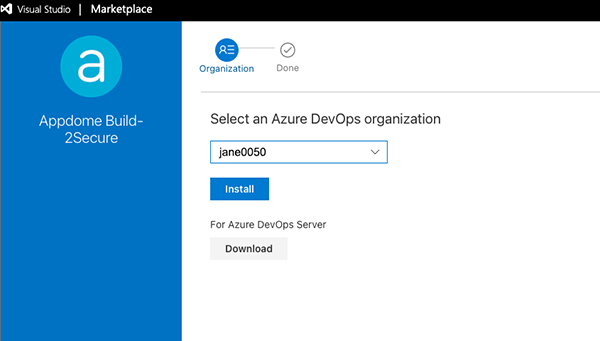
- Select an Azure DevOps organization and click Install.
Appdome Extension will be installed in this organization.
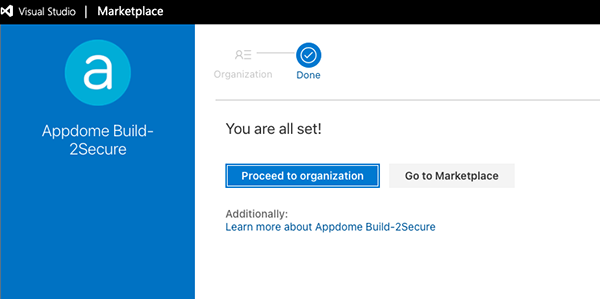
 After the extension installation is complete, the indication Done is displayed at the top. This indication notifies that Appdome Extension has been installed successfully. You can proceed to your organization to see the extension.
Step 3: Integrating the Build-2Secure Extension in Azure Pipelines
To integrate the Appdome Extension in Azure Pipelines:
- Sign into your Azure DevOps account to access the Azure Pipelines.
If you do not have a DevOps account, create an account by following the instructions on the web page https://azure.microsoft.com/en-us/products/devops. - Create a project and download the Appdome extension from the Azure marketplace as explained above.
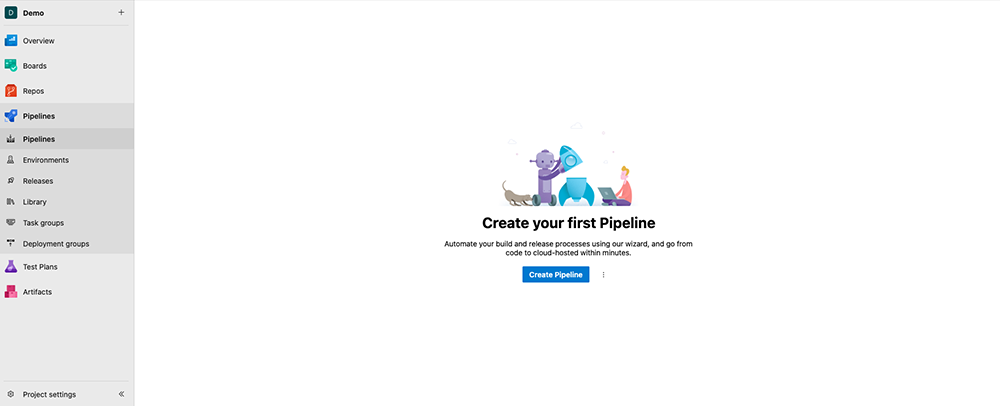
- To use the Appdome extension now, select Pipelines from the left side menu bar as shown below.
- If you do not have any pipeline, click Create Pipeline; otherwise, click New Pipeline.
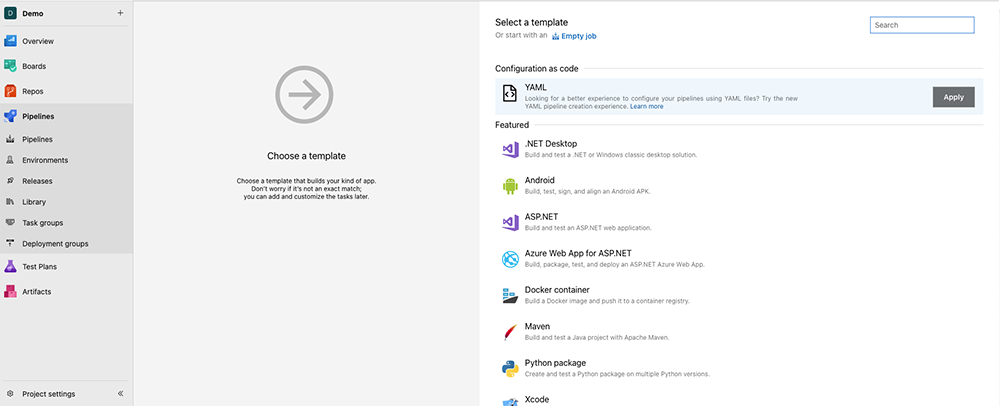
- For this demo, click Use the classic editor from the footer.
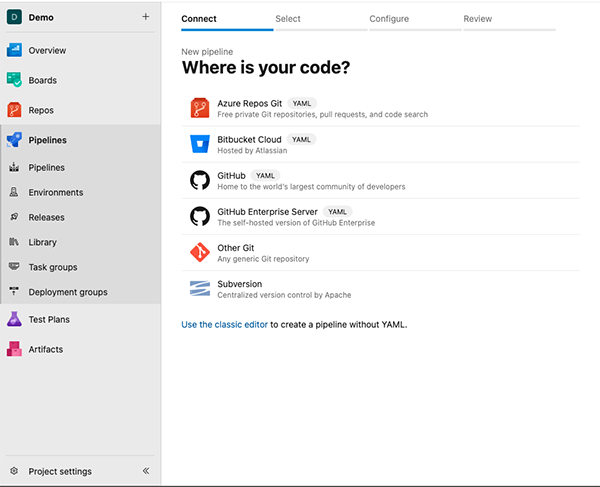
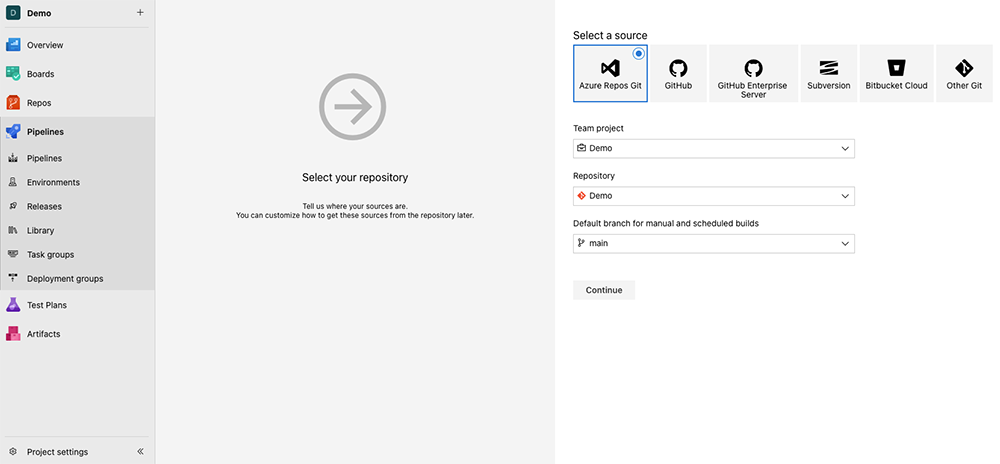
- Select your choice of versioning control software from the given options – in this case, Azure Repos Git.
- Select the Empty Job template type, to create the job from scratch.
- Click the + button to add a new task in the job, and then fill-in the required details.
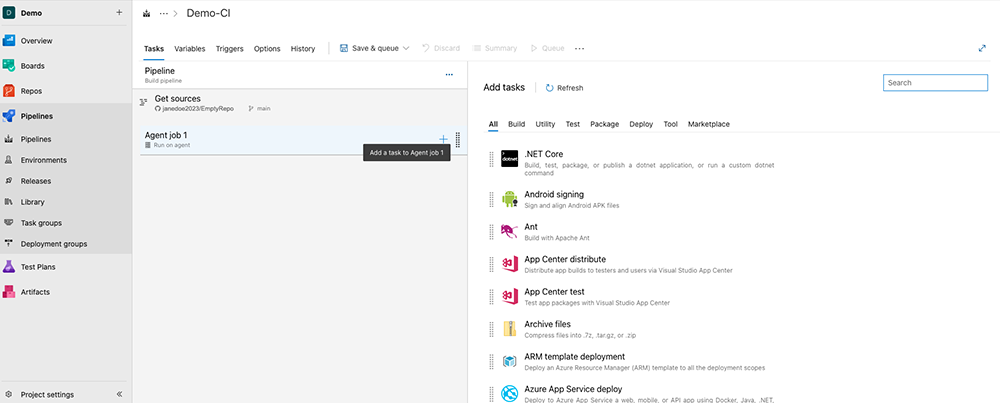
-
Search Build-2Secure in the search menu and click Add.
-
Output location – After naming your task, you can access your Appdome-secured app using the following variable:
$(<your_task_name>.AppdomeSecuredApp).
Note: when using the “second output” option specified above, the universal apk file will be generated to:
$(<your_task_name>.AppdomeSecondOutput).
- Appdome configuration example:
Step 4: Configure Appdome build-2Secure Extension in Azure Pipelines
-
-
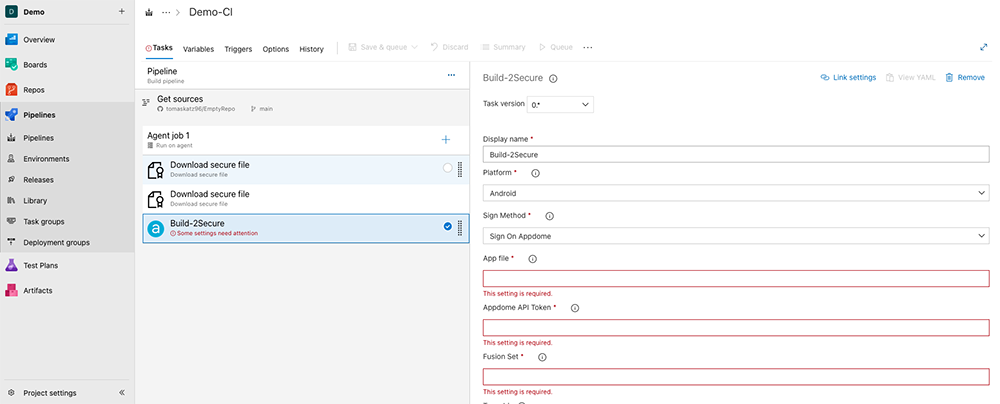
- Click the added task and start configuring the parameters.
● Platform
Either Android or iOS, depending on your app.
● Sign Method
Select between Sign On Appdome, Private Sign, or Auto Dev Sign.
● App file
Note:
Your app can be provided as a part of your build process, or as an independent step via one of the following methods.
If you’d like to use a .YML file to configure the plugin for your application, please see Appendix A for a sample code snippet.Enter the app file by using any of the following methods:
– Enter the URL address of the app file.
– If the file is in your selected file repository, use the file path to your application.
– If the file is in the Secure files of the azure pipeline:
a. Search for a task called Download secure file.
b. Click the file and then click Add.
c. Place the file before the Build-2Secure task
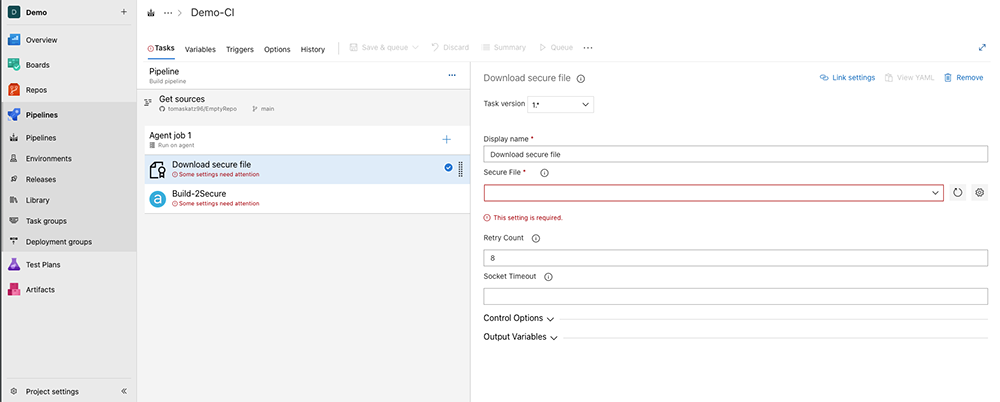
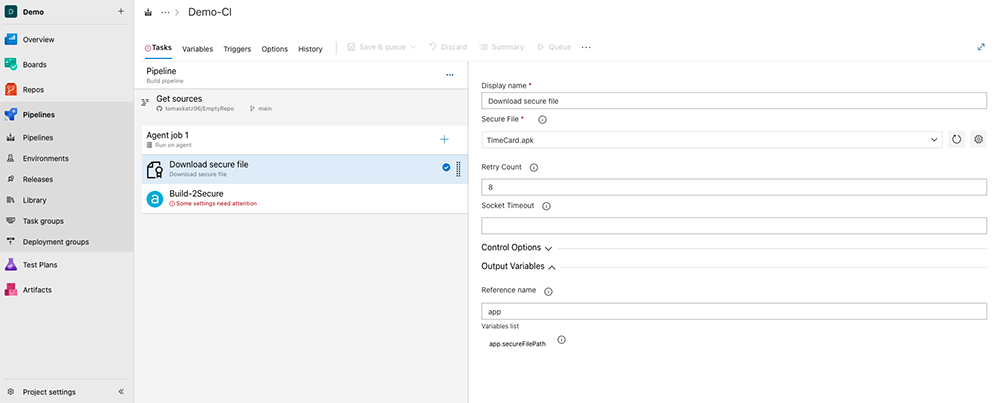
d. Add your file in the row highlighted in red in the image above.
e. Use the Reference Name file under the Output Variables section to enter a name of your choice.
Note:
When you pass this file to Appdome task, by using the Build-2Secure tab, you need to use the $(<your_file_name>.secureFilePath) convention; in the example below, $(app.secureFilePath).
● Appdome API Token
This is a password you got from Appdome, and you can add it by using either of the following methods:
– Enter the token as is.
– Use the Variables section to add a variable and assign a name to it.
In the example below, the variable is called token and you can then reference it as $(token).
● Fusion Set
Use this field to enter the fusion set (mandatory). The fusion set you enter must match the platform. Just like the token, the Fusion Set can be added either as a simple string or as a variable through the Azure platform, as explained above.
● Team ID
Use this field to enter the team ID from the Appdome platform (optional). Just like the token, the team ID can be added either as a simple string or as a variable through the Azure platform, as explained above.
● Build with logs
Mark checkbox if you’d like to build your app with diagnostic logs.
● Build to Test
Allows automated testing of Appdome Secured Apps in standard DevOps testing suites.
Do not use this service for individual device testing.
Select the desired Testing Service from the drop-down menu.
● Second Output (.aab apps only)
Mark checkbox if you’d like to sign second output. Set a path for the second .apk file to be downloaded.
Note: This option is not supported with Auto-Dev signing.
● Secured File Name: (optional)
This will override the default output name for Appdome’s secured app output(if specified, it will also effect the universal apk for.aab apps).
Note:The App name should not include the extension.
- Click the added task and start configuring the parameters.
-
Step 5: Configure Mobile App Signing with Build-2Secure Extension
From this stage onward, the procedure depends on the previously selected Platform and Sign Method.
There are 3 signing options available with Appdome: the On-Appdome signing method, Private-Signing method, or the Auto-Dev-Signing method.
The following example specifies the steps required when the selected platform is Android and the selected sign method is Sign on Appdome.
Fill-in the parameters as follows:
- Keystore File
Add the file name with all of the options that were explained in the App file section. - Keystore Password
- Keystore Alias
- Key Pass
Note:
Adding the password, alias, and pass is done by using a similar process used for adding a token, as explained earlier.

Other Signing Methods
This section specifies several other sign methods:
iOS platform with Sign On Appdome
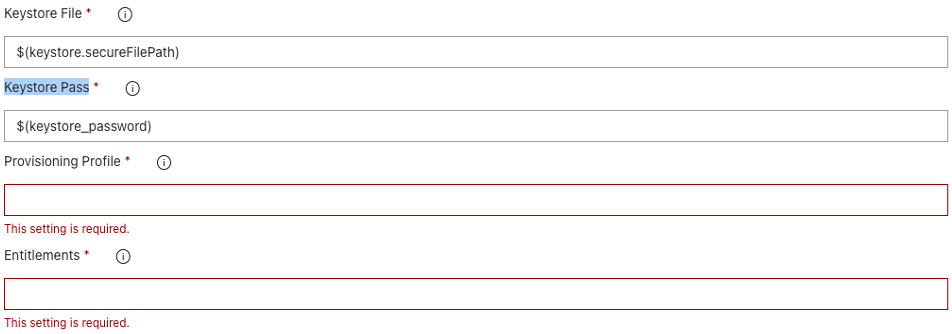
When signing iOS by using the Sign On Appdome method, fill-in the various fields as follows:
- Keystore File
You can enter a keystore file by using all methods specified in the App file section. - Keystore Pass
You can enter a keystore pass by using all methods specified in the token section. - Provisioning Profile
You can enter a profile by using all methods specified in the App file section. You can enter several files connected with ‘,’. for example “file1”,”file2”,”file3”. - Entitlements
You can enter the entitlements by using all methods specified in the App file section.
iOS platform with Private Sign
When signing iOS by using the Private Sign method, fill-in the Provisioning Profile field. You can enter a profile by using all methods specified in the App file section. You can enter several files connected with ‘,’. for example “file1”,”file2”,”file3”.
iOS platform with Auto Dev Sign
When signing iOS by using the Auto Dev Sign method, fill-in the various fields as follows:
- Provisioning Profile
You can enter a profile by using all methods specified in the App file section. You can enter several files connected with ‘,’. for example “file1”,”file2”,”file3”. - EntitlementsYou can enter the entitlements by using all methods specified in the App file section.
Private Sign or Auto Dev Sign on the Android platform
When signing Android by using the Auto Dev Sign or Private Sign method, fill in the Signing Fingerprint field by using all methods specified in the token section.
Step 6: Build & Sign Android & iOS Security with Build-2Secure
Azure Artifacts enable developers to consume and publish different types of packages to Artifacts feeds and public registries such as NuGet.org and npmjs.com. For details, see Microsoft documentation.
Add a task called Publish Pipeline Artifacts.
-
- Enter the value $(Build.ArtifactStagingDirectory) in the File or directory path field.
- Optionally, enter a user-defined name in the Artifact name field as shown below.

- After finishing the required configuration and selecting the signing method, click Save and run.
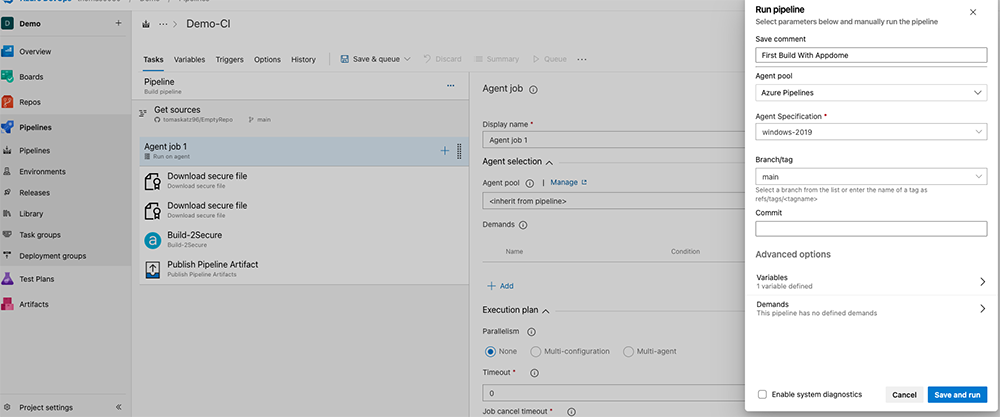
- You will be now prompted to the job page.
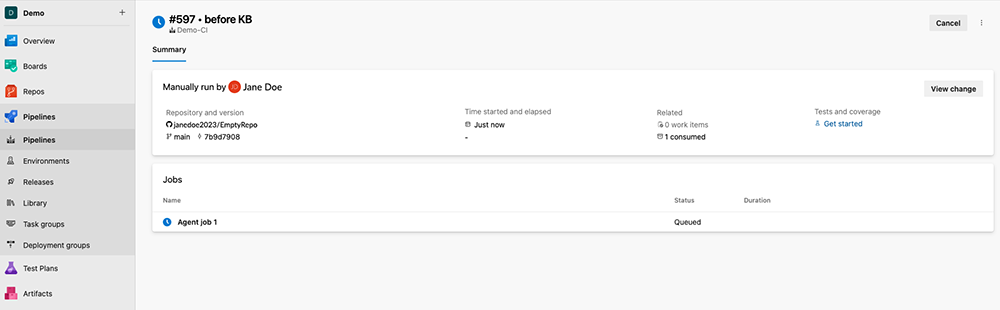
- When the job is complete, click on published under the Related section.

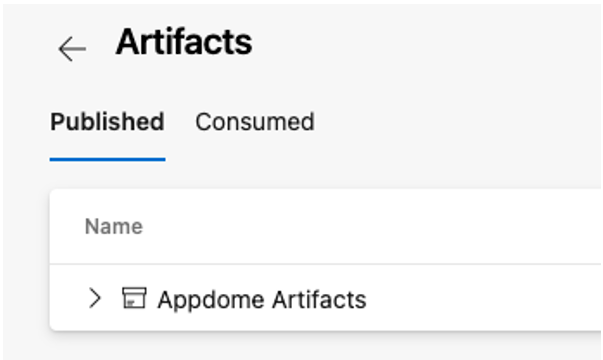
- The Artifacts section is displayed, containing the directory with your app secured by Appdome.
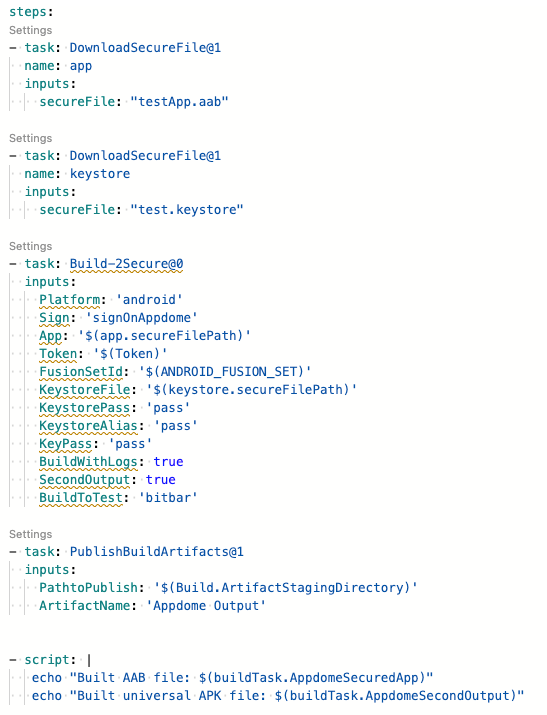
Appendix A: YAML Workflow code sample
variables:
- group: MyCompany

trigger:
- main

steps:

- task: DownloadSecureFile@1
  name: App
  displayName: 'Download App'
  inputs:
    secureFile: ‘MyApp.apk'
- task: DownloadSecureFile@1
  name: keystore
  displayName: 'Download Keystore'
  inputs:
    secureFile: ‘mycompany.keystore'

- task: Build-2Secure@0
  inputs:
    Platform: 'android'
    Sign: 'signOnAppdome'
    App: ‘MyApp.apk'
    Token: '$(Token)'
    FusionSetId: '$(Android_fusion_set)'
    KeystoreFile: '$(keystore.secureFilePath)'
    KeystorePass: ‘mypass’
    KeystoreAlias: ‘myalias’
    KeyPass: ‘mypass'
    BuildWithLogs: true
  name: buildTask

- task: PublishBuildArtifacts@1
  inputs:
    PathtoPublish: '$(Build.ArtifactStagingDirectory)'
    ArtifactName: ‘Mycompany Output'

- script: |
   echo "Built APK file: $(buildTask.AppdomeSecuredApp)"
Related Articles
- How to Secure Android & iOS Apps in Bitrise CI/CD Pipelines
- How to Add an Android or iOS app to DevSecOps Build System in DevOps CI/CD
- How to Use Secure Android & iOS Apps in GitHub CI/CD
- How to Secure Android & iOS Apps in GitLab CI/CD Pipelines
How Do I Learn More?
The description above is designed to help you secure Android & IOS apps in Azure CI/CD pipelines. If you have questions about using this Build2Secure step for Azure, please send them our way at support.appdome.com or via the chat window on the Appdome platform.
Thank you!
Thanks for visiting Appdome! Our mission is to secure every app on the planet by making mobile app security easy. We hope we’re living up to the mission with your project.