How to Test Secured iOS Apps on BitBar
BitBar allows app testing using its Live Testing and Automation test suits. Both can be used to test Appdome-secured mobile apps.
When using Bitbar to run Live App or App Automate testing on an Appdome-protected app, you can choose between either of the following methods:
- Use Appdome’s Build2Test service (Recommended)
Customers with an Appdome SRM license can use Appdome’s Build2Test service to quickly and easily test their Appdome-secured mobile apps by using BitBar without the need for different Fusion Sets. With Appdome’s Build2Test service, Appdome’s in-app defense model recognizes the unique signature of these testing services and allows for easy testing without issuing a security alert or forcing the app to exit, even if these services use tools such as Magisk or Frida. For details, see How to Use Appdome Mobile App Automation Testing.
Possibly Triggered Appdome Protection Features
Below are the Appdome security features that may be triggered during testing on BitBar, along with their behaviors under the Build2Test setting:
| Appdome feature | Reason | Behavior with Build2Test |
| Deep Proxy Detection | Detects any proxy usage that could be employed during testing for network traffic analysis. | The app will detect the use of proxies but will not crash, allowing testing to continue. |
| Secure App Signature | Ensures the app’s signature hasn’t been tampered with, which might be checked during installation on test devices. | The app will verify the integrity of its signature but will not crash, allowing the testing to continue. |
| Detect App is Debuggable | Identifies if the app is running in a debuggable state, often used in testing for logging and debugging purposes. | The app will detect debug mode but will not crash, ensuring the testing can proceed uninterrupted. |
| Anti-Swizzling | Protects against method swizzling which could be used to alter app behavior during testing. | The app will detect swizzling attempts but will continue running, allowing for uninterrupted testing. |
| Jailbreak Detection | Detects if the testing environment simulates or involves jailbroken devices. | The app will detect the use of bypass tools but will not crash, allowing for uninterrupted testing. |
| Block Jailbreak Bypass Tools | BitBar might have methods that detect jailbreak bypass tools. | Build2Test ensures that the app blocks jailbreak bypass tools while allowing testing to continue. |
| Enforce Cipher Suites | Confirms that the app enforces secure cipher suites, which could be critical in testing network security. | The app will enforce specific cipher suites but will not terminate or crash, allowing secure and continuous testing. |
Live App testing – iOS
- Log in to your BitBar account. Alternatively, if you do not yet have an account, Create an account.
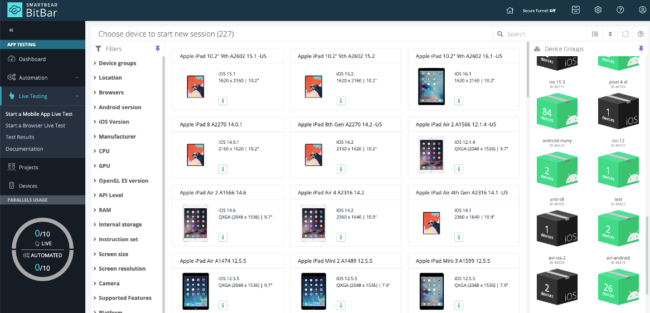
- Under Live Testing, click Start Mobile App Live Test.
- Select a device or a device group (shown on the right side) from the displayed list.

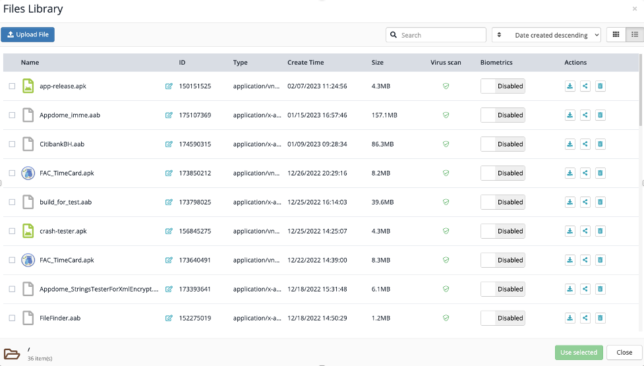
- Click Files on the left-side menu, and then Upload or choose Files +.
A file library with the previously uploaded app files is displayed. - Select the app you would like to test, and then install and launch the selected app on the test device.
If you have not yet uploaded the test app, do so now by clicking the Upload File button at the top and then selecting it.
Note: The files in the app library are sorted alphabetically and include files from all platforms.
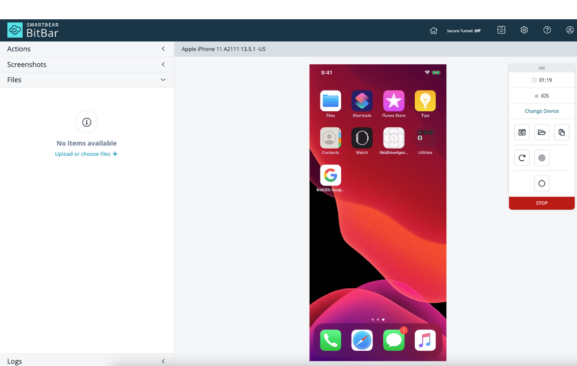
- Perform your tests manually.
- Click STOP when done.
The test session details will be displayed, and the test results will be available for later viewing under Live Testing > Test Results.
Automation App Testing – Appium iOS Client Side
Automation App testing – iOS Server Side
BitBar allows you to test your app by uploading your test code and running it on their cloud, using various automation frameworks such as Appium, Robot, and Selenium.
To test your app on the iOS server side:
- After successfully building and signing your app on Appdome, Log in to your BitBar account. Alternatively, if you do not yet have an account, Create an account.
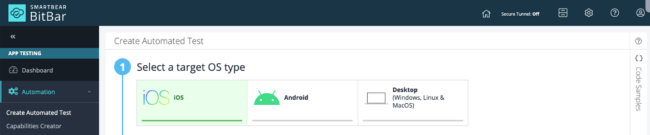
- Under Automation, click Create Automated Test.
- Select iOS as the target OS type.
- Use the Select a Framework section to click Server Side (Appium and other frameworks).

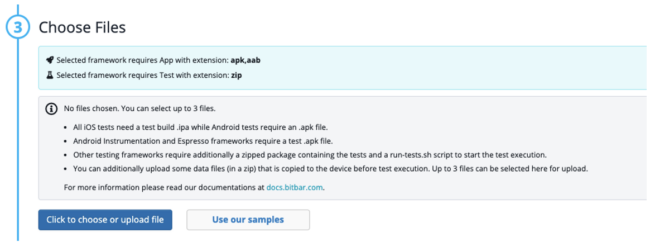
- Use the Choose Files section to click on Click to choose or upload a file and select your test app and the test code (.zip) from the displayed list.
If the app and the test code file are not in the displayed list, click Upload File, upload your test app and the test code .zip file, and then select both for testing.
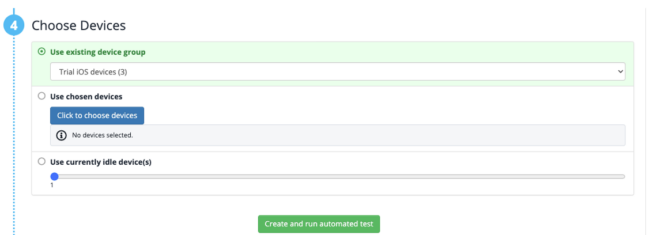
- Use the Choose Devices section to select any of the following options:
- Use existing device group
Allows you to provide the name of the previously created device group. - Use chosen devices
This allows you to select the test device from the list of available devices. - Use currently idle devices
Allows you to let BitBar select test devices that are currently idle.
Slide the blue circle on the bar below to indicate the number of devices you want to include in the test.
- Use existing device group
- Click Create and run an automated test.
- When done, click on Go to results.
Troubleshooting Tips
Most automation test tools can typically be used in one of two modes: emulator mode and real device mode (specific terms may vary according to the testing tool). If you use the automation test tool in “emulator mode” instead of “real device mode,” the Appdome-secured application will not run on the device. This is expected because Appdome ONEShield protects apps from running on emulators/simulators. Instead, it would be best if you run the automation test tool on a real device mode.
Related Articles:
- How to Use Appdome’s Build2Test Service
- How to Test Secured Android Apps on BrowserStack
- How to Test Secured iOS Apps on BrowserStack
- Test Appdome-secured Android Apps on Lambdatest
- How to Test Secured iOS Apps on Lambdatest
- How to Test Secured iOS Apps on SauceLabs
- How to Test Secured Android Apps on SauceLabs
Thank you!
Thanks for visiting Appdome! Our mission is to secure every app on the planet by making mobile app security easy. We hope we’re living up to the mission with your project.
If you have any questions, please send them our way at support.appdome.com or via the chat window on the Appdome platform.