How to use Appdome's Validate-2secure Plugin for Jenkins
Learn how to set up and use the Appdome Validate-2Secure plugin for Jenkins. The validate plugin helps in troubleshooting app signing in secured Android and iOS apps, ensuring that they have not been tampered with in any way that would prevent them from running on any mobile device.
Prerequisites for using Appdome Validate-2secure Plugin for Jenkins:
-
- An Appdome SRM account
- Jenkins CI/CD server (This guide was made with Jenkins 2.375.3)
- CURL installed on your Node.
- Environment Injector plugin (Optional)
Install the Appdome Validate-2secure plugin in Jenkins.
-
-
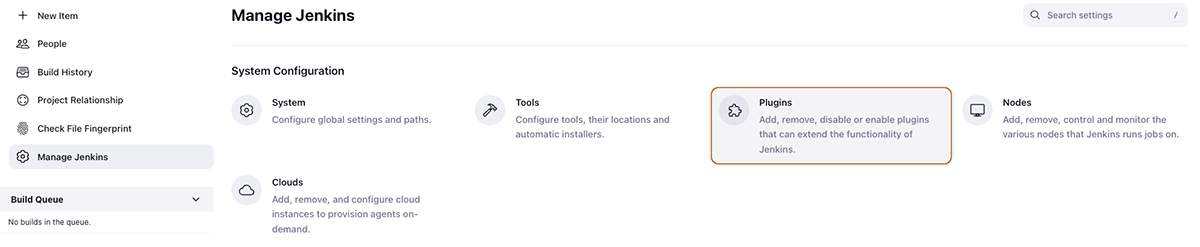
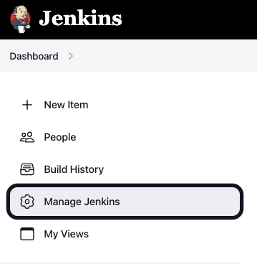
- Go to the Jenkins homepage and select “Manage Jenkins” from the left sidebar:
![Jenkins Dashbord 1 [manage Jenkins]](https://www.appdome.com/wp-content/uploads/2023/09/jenkins-dashbord-1-manage-jenkins.png)
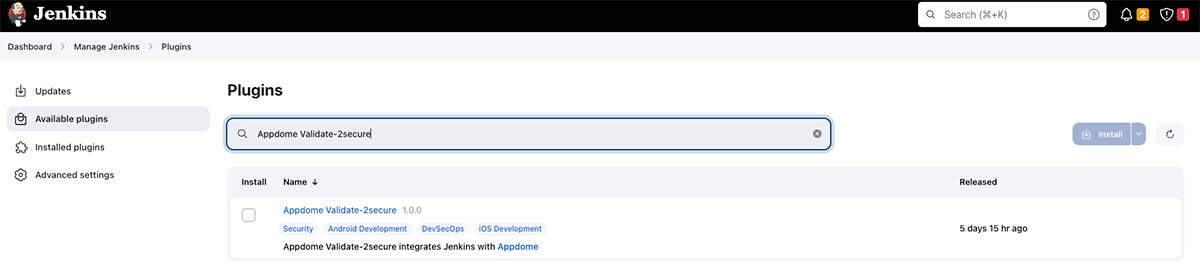
- Select “Plugins”
- Add the Appdome Validate-2secure plugin to Jenkins through the Jenkins Plugin Index:
a. Select the “Available Plugins” tab and search for “Appdome Validate-2secure”.
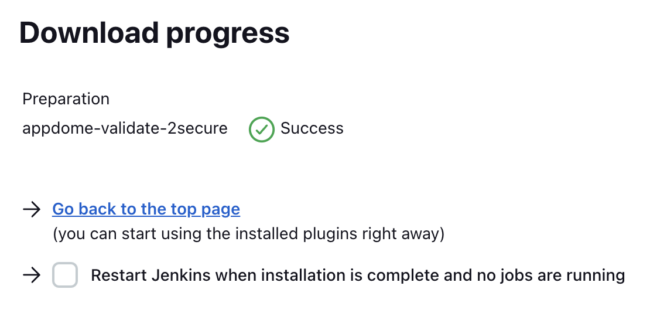
b. Select the Appdome validate-2secure plugin and click “Download now and install after restart”.
c. Restart your Jenkins server.

- To confirm the successful installation of the plugin, navigate to “Manage Jenkins” – > “Installed plugins” and then search for “Appdome Validate-2secure.”

- Go to the Jenkins homepage and select “Manage Jenkins” from the left sidebar:
-
The Appdome Validate-2Secure plugin can be used in both freestyle projects and pipelines. To utilize the plugin in a freestyle project, it is necessary to add the plugin as a build step. Alternatively, if you opt to use a pipeline, we have also included instructions on how to incorporate the plugin into the appropriate stage of your pipeline script later in the guide.
Appdome Validate-2Secure Plugin in Jenkins (Freestyle Project)
This step provides instructions for adding the Appdome Validate-2Secure Plugin in the following methods:
* Adding the Appdome plugin to a new project
* Adding the Appdome plugin to an existing project
Adding the Appdome Plugin to a New Project
To add the Appdome plugin to a new project:
-
-
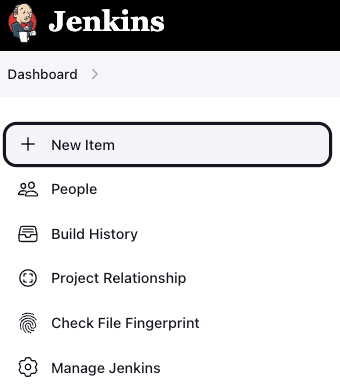
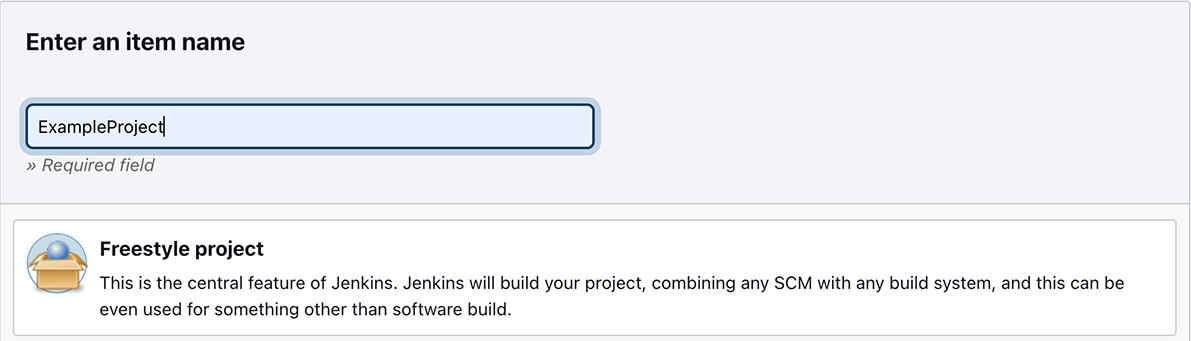
- Click New Item from the Jenkins menu.
- Assign a name to your project and select the Freestyle Project type, then click OK.
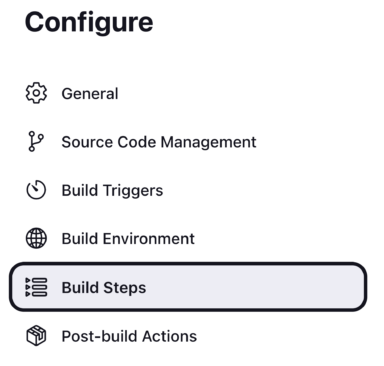
- Click on the Build Steps button
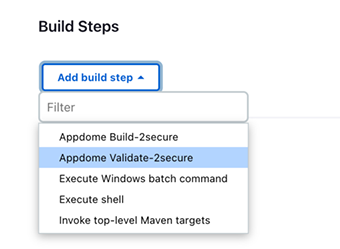
- Select Add build step and choose the Appdome Validate-2Secure option.
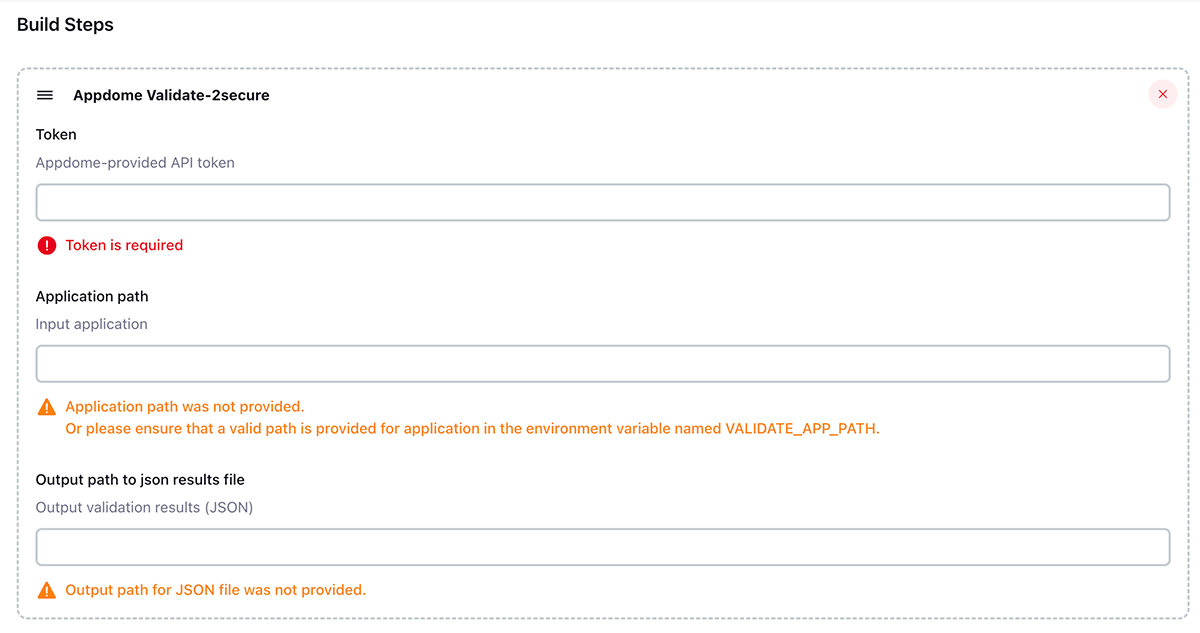
- Set the Appdome validate-2Secure plugin configuration by filling in the following fields.

- Click New Item from the Jenkins menu.
-
Adding the Appdome plugin to an existing project
To add the Appdome plugin to an existing project:
-
-
- Select the project to which you want to add the plugin.
Go to Configure from the Jenkins menu:

- Open the Add build step menu and then select Appdome Validate-2Secure.

Appdome validate-2Secure UI shows up, allowing you to enter your configuration.

- Proceed to set the Appdome validate-2Secure plugin configuration, as described in the next step.
- Select the project to which you want to add the plugin.
-
-
-
Configure Appdome validate-2Secure Plugin Configuration
-
-
-
- Use the Token field to enter your Appdome Validate2Secure API token, by following the instructions provided in section Getting and resetting your API Token on Appdome website.
- Use the iOS/Android application path field to choose any of the following options:
a. Specify the full path to the application file on the node where it is running.
b. Set the environment variable name as VALIDATE_APP_PATH.
c. Set a remote URL link to a file either on the configuration page or as an environment variable named VALIDATE_APP_PATH.
Note: The URL link should not contain any commas. - Use the Output Location field to save the JSON results file
Enter a new value or leave the default value “APP_PATH_LOCATION(excluding the application name)/Validation_results.json”
Should you wish to save the validation JSON file in an alternate location, specify the complete path of your choice.
For example: ‘<your_path/NAME_FOR_JSON_RESULT_FILE>.json.’
In the event that you provide a directory as the location, the JSON Results file will be stored within this directory under the name ‘Validation_results.json.’
-
For instructions on how to set environment variables, see Appendix A: How to Set Environment Variables.
Warning
When using the configuration form, any input that has the same field as an environment variable (e.g. validate app’s path) will take precedence, i.e. it will override the environment variable. Therefore, to ensure proper use of the environment variable input, you must verify that these variables are unique and do not appear in the configuration form.
After filling in all the required parameters, you can save the configuration and begin validating your application and verify it with the Appdome Validate-2Secure for Jenkins.
Appdome Validate-2Secure Plugin in Jenkins (Pipeline Project)
Creating the Validate-2Secure plugin in Jenkins
This step provides instructions on how to install the Appdome Validate-2Secure Plugin using either of the following methods:
-
-
- Adding the Appdome plugin to a new project
- Adding the Appdome plugin to an existing project
-
Adding the Appdome Plugin to a New Project
To add the Appdome plugin to a new project:
-
-
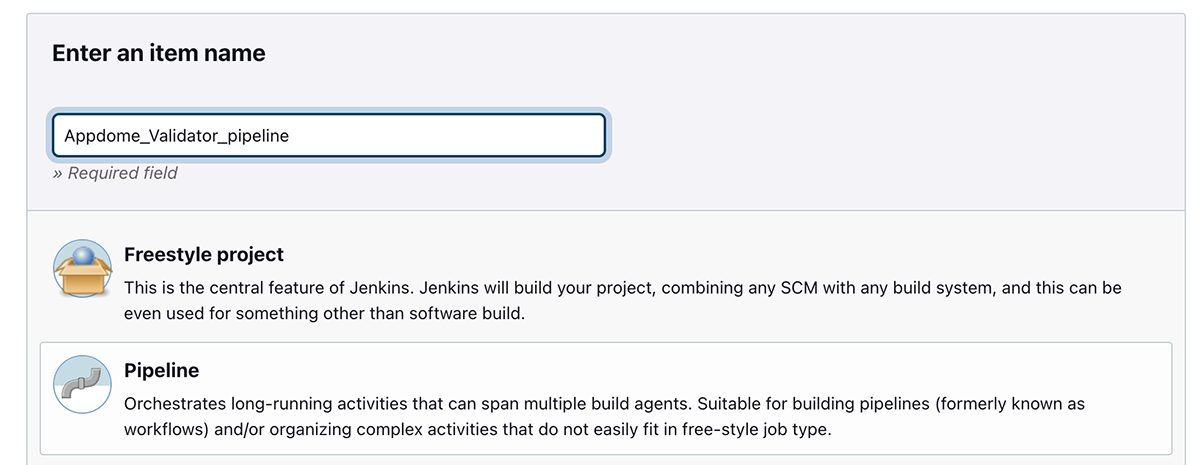
- Click New Item from the Jenkins menu

- Assign a name to your project and select the Pipeline type, then click OK.
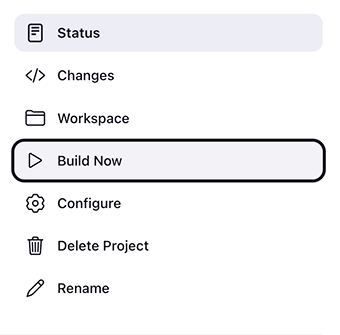
- Click on the Pipeline button.
- Write your pipeline steps as required.

- Continue to the “Configuring Validate-2Secure Plugin on Appdome” step.
- Add the Appdome plugin to an existing project:
- Select the project to which you want to add the plugin.
- Click on the Configure button in the Jenkins menu:

- Select the Pipeline:

- Write your pipeline steps as required.
- Proceed to setting the Appdome validate-2Secure plugin configuration, as described in the next step.
- Click New Item from the Jenkins menu
-
Configuring Validate-2Secure Plugin on Appdome
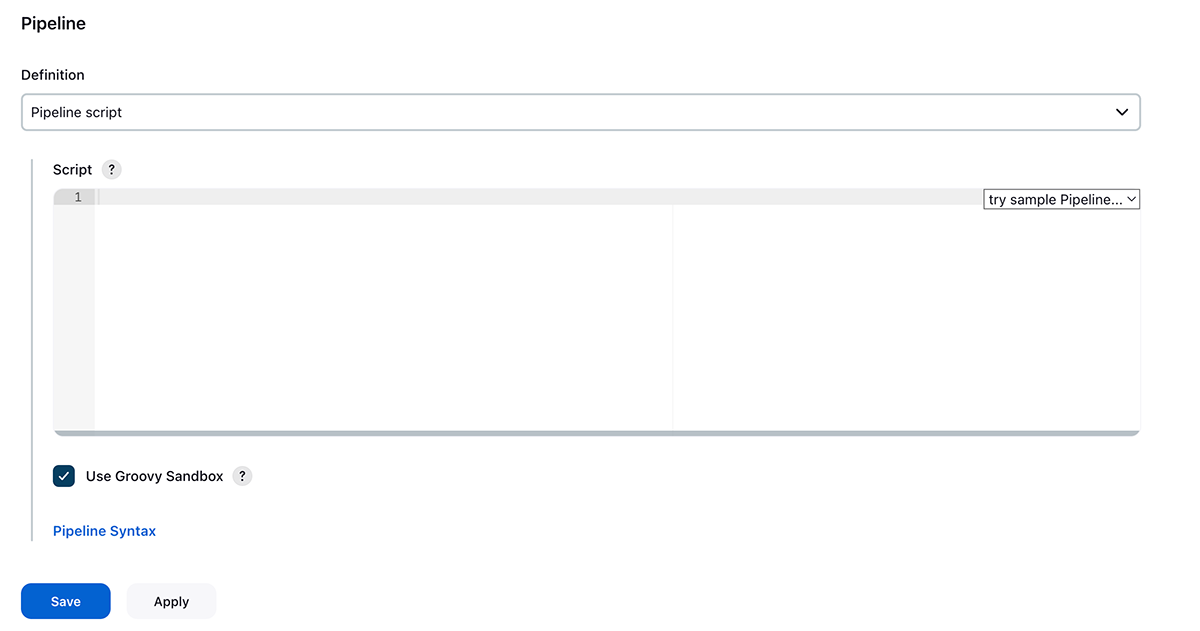
To use the Appdome validate-2Secure plugin, add one of the next pipeline templates:
stages {
    stage('Appdome Validate') {
        steps {
            AppdomeValidator (
                appPath: '<FULL_PATH_OR_ENV_VAR_OR_URL_TO_APP_FILE>',
             outputLocation: '<PATH_TO_JSON_RESULTS_VALIDTION_FILE>.json',
                token: hudson.util.Secret.fromString('<YOUR_TOKEN>')
            )
        }
    }
}
Inputs explanation:
Replace all placeholders, which are located within brackets (for example, ‘<YOUR_TOKEN>’) with the right value in accordance with the relevant template:
-
-
- To use the token field, replace ‘<YOUR_TOKEN>’ with your Appdome Validate2Secure API token. You can obtain this token by following the instructions provided in the API guide.
-
For instructions on how to set environment variables, see Appendix A: How to Set Environment Variables.
-
-
- To use the appPath field
- Replace ‘<FULL_PATH_OR_URL_TO_APP_FILE>’ with the full path on the node machine.
- Specify a full path to the file with the environment variable name VALIDATE_APP_PATH. If using the environment variable, leave the appPath empty.
- Replace ‘<FULL_PATH_OR_URL_TO_APP_FILE>’ with a remote URL link to a file either on the pipeline page or as an environment variable named VALIDATE_APP_PATH. If using the environment variable, leave the appPath empty.
Note: The URL link must not contain any commas.
- Use the outputLocation field to save the JSON results file.
- Enter a new value or leave the default value “APP_PATH_LOCATION(excluding the application name)/Validation_results.json” When using the default value do not include the ‘outputLocation‘ parameter.
- Should you wish to save the validation JSON file in an alternate location, make sure to specify the complete path of your choice. For example: ‘<your_path/NAME_FOR_JSON_RESULT_FILE>.json.’
- In the event that you provide a directory as the location, the JSON Results file will be stored within this directory under the name ‘Validation_results.json.'”
- To use the appPath field
-
Important Note: When using pipelines, your initial build attempt may fail due to the use of the “fromString” function. If this occurs, please navigate to the failed build and select “Console Output.” You will receive a message indicating that “Scripts not permitted to use staticMethod hudson.util.Secret fromString java.lang.String“. Administrators can decide whether to approve or reject this signature.By clicking on the hyperlink, you will be directed to a new message where you can approve the script. Ensure you approve the script in order to successfully proceed with your pipeline build.

Confirming Validation on Appdome
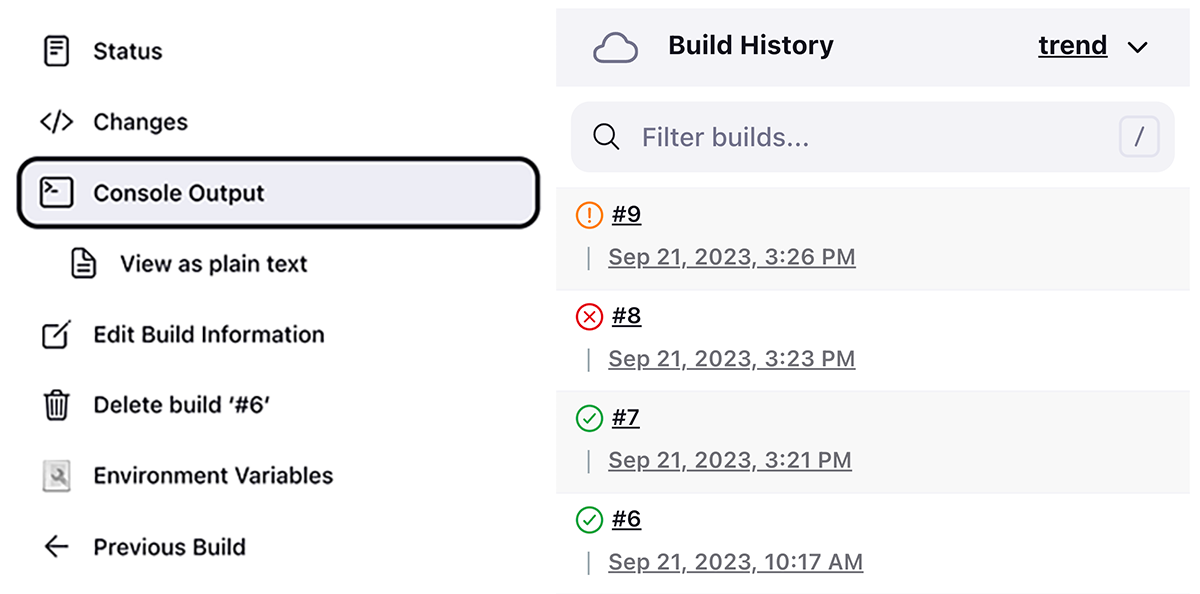
In Jenkins, you can monitor the validation process and results by checking the following sections:
-
-
- Build History – Displays the status and result of each build.
- Console Output – Provides detailed information about the build process and any errors or warnings that may have occurred.
-
Result Validation
In the event that an error is detected within the application, the Jenkins job will be marked as failed.

Within the console log, you can meticulously examine the results to gain a comprehensive understanding of the specific reasons behind the failure. For instance, if the application lacks the necessary protection provided by Appdome, you will receive a warning, exemplified as follows:
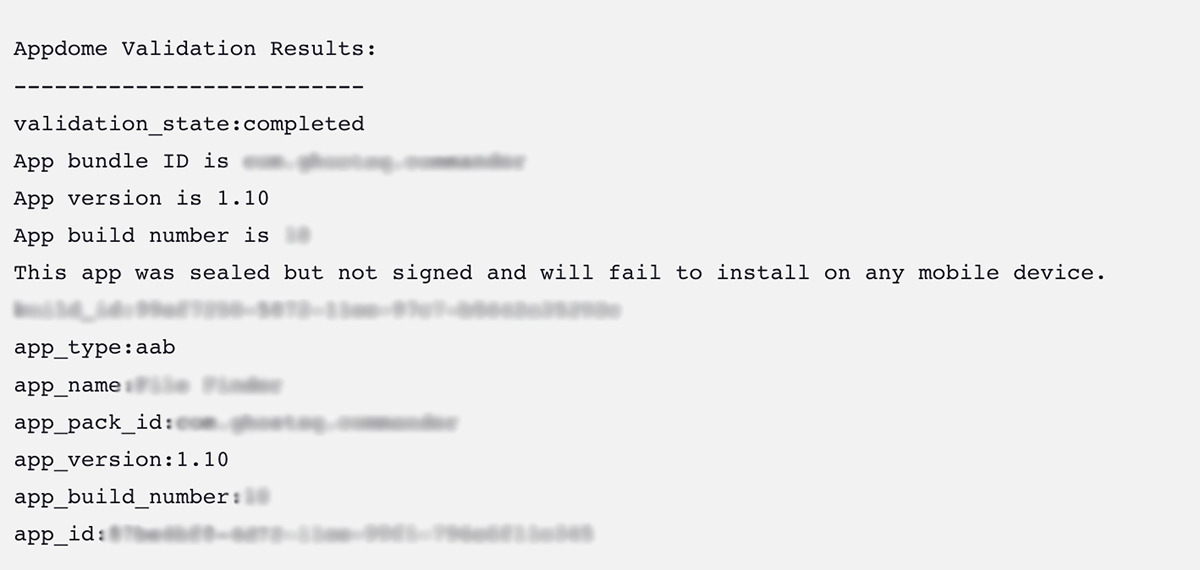
If the app is not protected with Appdome.

For example:

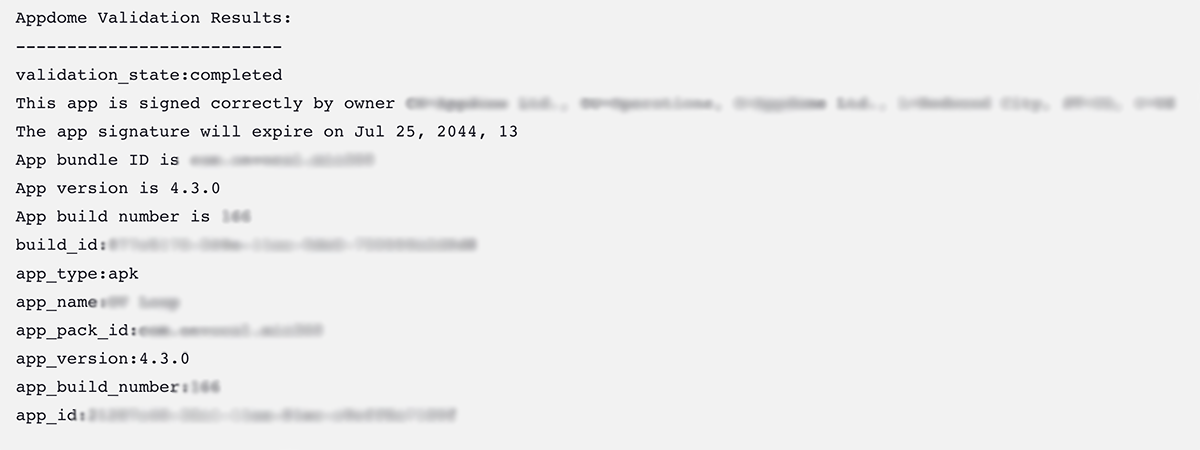
If everything is setup correctly and all aspects are functioning as expected and there are no errors to report:
How to set environment variables: Appendix A
-
-
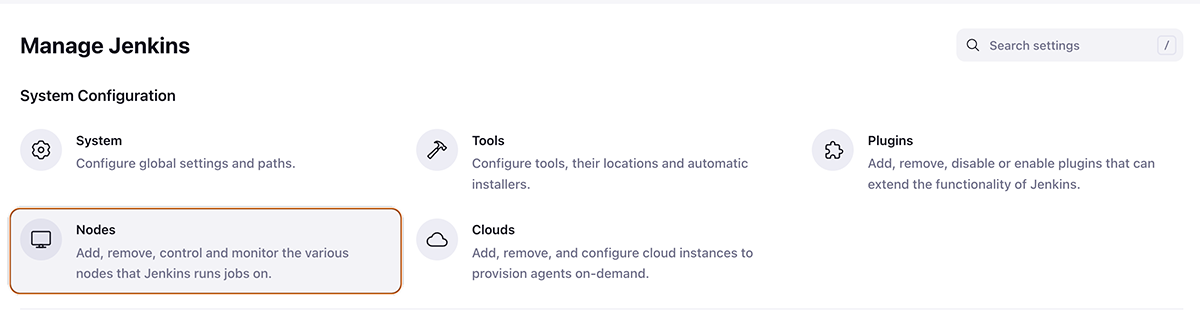
- Go to “Manage Jenkins”
- Select “Manage Nodes and Clouds.”
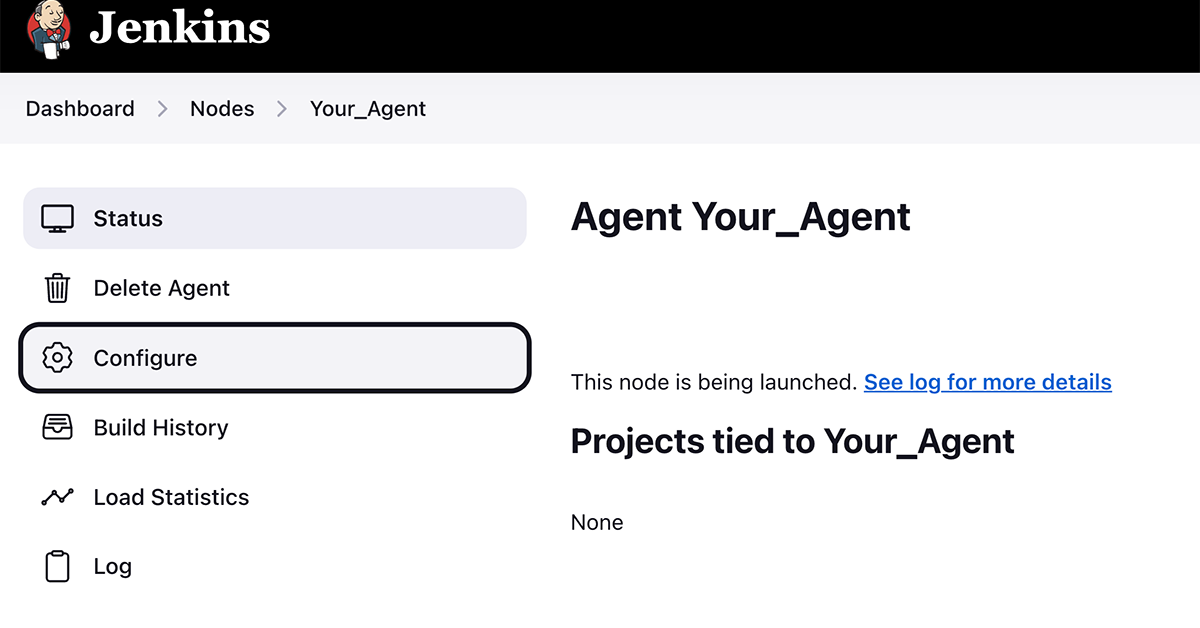
- Choose the agent you want to build on:

- Choose “Configure”
- Scroll down to “Node Properties” and check the “Environment variables” box if it hasn’t already been checked.
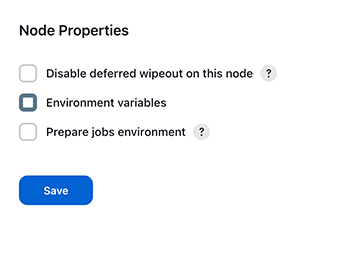
- Add as many environment variables as you need, and save.
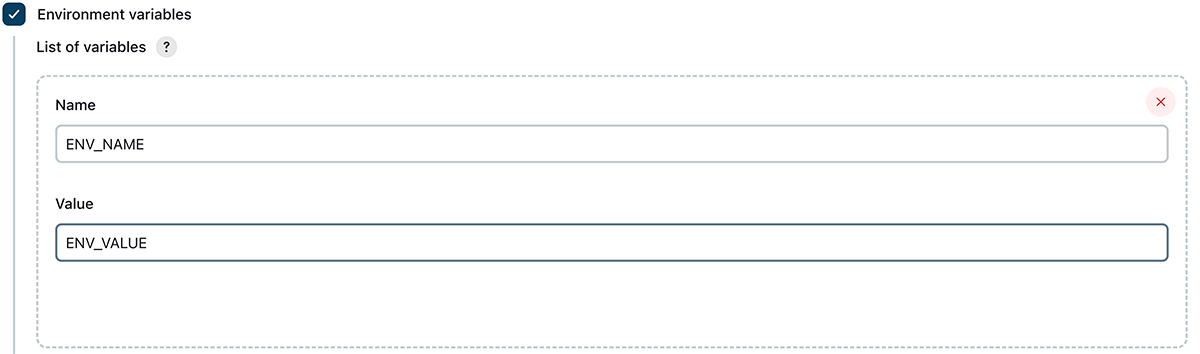
- Go to “Manage Jenkins”
-
Related Articles
Thank you!
Thanks for visiting Appdome! Our mission is to secure every app on the planet by making mobile app security easy. We hope we’re living up to the mission with your project.